If you have come across this article, you are probably looking for the easiest way to learn how to use the quick selection tool Photoshop. Well, we are here to help you out.
The quick selection tool can make your experience in Photoshop far better. But the question is, how to use it? There’s a misconception that this tool is pretty complicated to operate. Let me tell you; it’s completely wrong! Just by following some steps correctly, you can easily use it.
In this tutorial, we will talk about how to use the quick selection tool in Photoshop. From downloading the software to finish the editing, we will tell you everything step by step. No matter if you are a complete beginner or have a little knowledge about Photoshop, this tutorial will be a great help for you. What are you still waiting for? Start reading with us already!
How To Download Adobe Photoshop?
Before starting editing, you need to have the Adobe Photoshop software downloaded and installed in your PC/ Laptop. It’s not free software but allows free trials. Also, some websites provide this software for free. We will tell you about both paid and free installation.
Free Software
If you are a beginner, it can be hard for you to afford the paid version. In that case, you can choose the free software for the time being. Let’s know the process-
Step-1: Go To The Website
Open the chrome browser in your PC/laptop and type “GetIntoPc.” It will take you to the website from where you can download your desired software.
Step-2: Download Setup Files
Search for the software in the search bar. After that, click on the software.
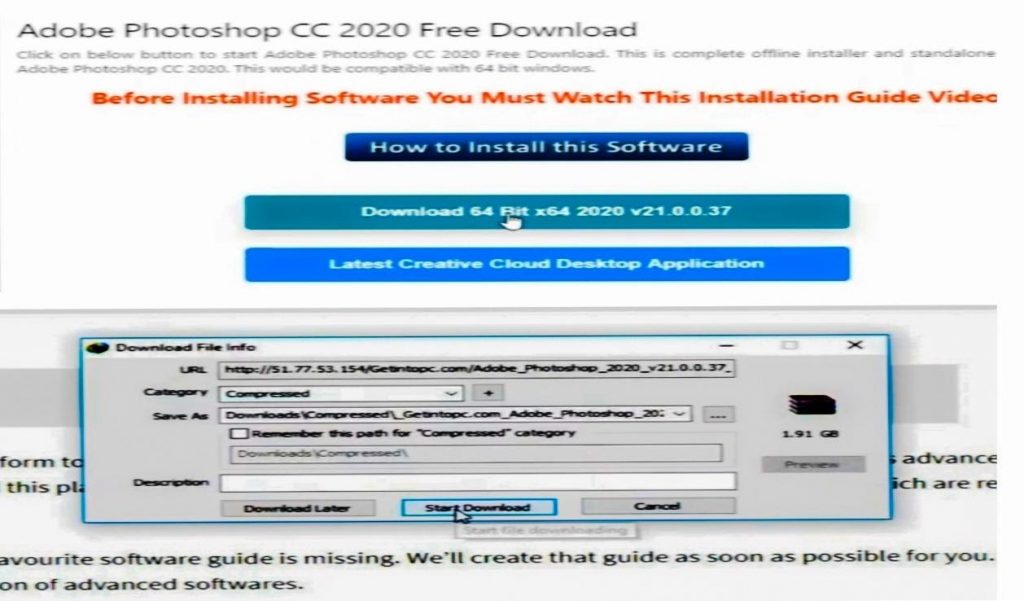
Scroll down a bit, and you will find an option named “download.” Click on that. The setup file will ask for your permission. A click on the “start download,” and the file will start downloading.
Step-3: Extract File
Go to the downloads on your PC and select the setup file for Adobe Photoshop. Right-click on the mouse, and you will find an option “Extract Here.”
Step-4: Install
After extracting, select the new file.

Now go to the “set-up.exe” and click.

The software will ask permission for continuation. Click the “continue” and your software is installed.
Paid Version Software
If you intend to use the software for a long time, we recommend getting the paid version. How to get it? We will tell you how.
Step-1: Go To the Website
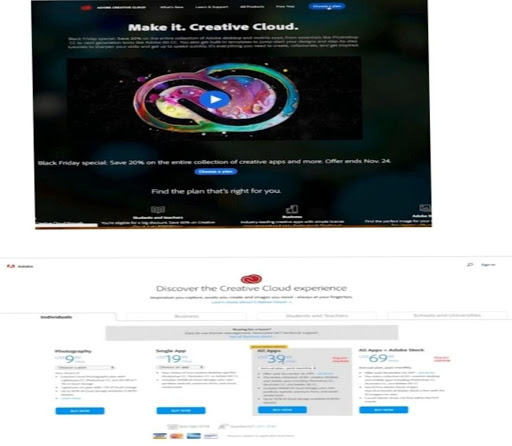
Go to Adobe’s personal “Creative Cloud Website.” Now choose a plan. If you want access to all apps from Adobe, select the option “All Apps” and click on “buy now.”
Step-2: Download
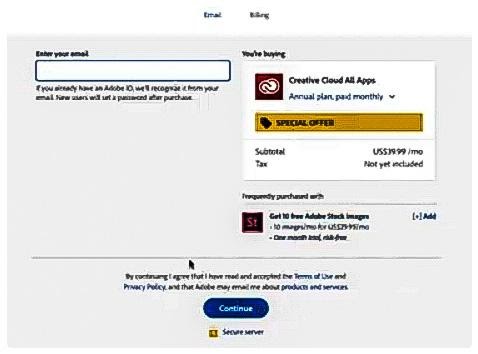
After clicking buy now, it will ask you to fill up a form to sign in. Fill that up and click on “continue” to progress further.

Then it will take you to your account. Now click on the option saying “Desktop apps,” and you will find all apps there. But first, you need to download the “Creative Could” app. Click on “download.”
Step-3: Install
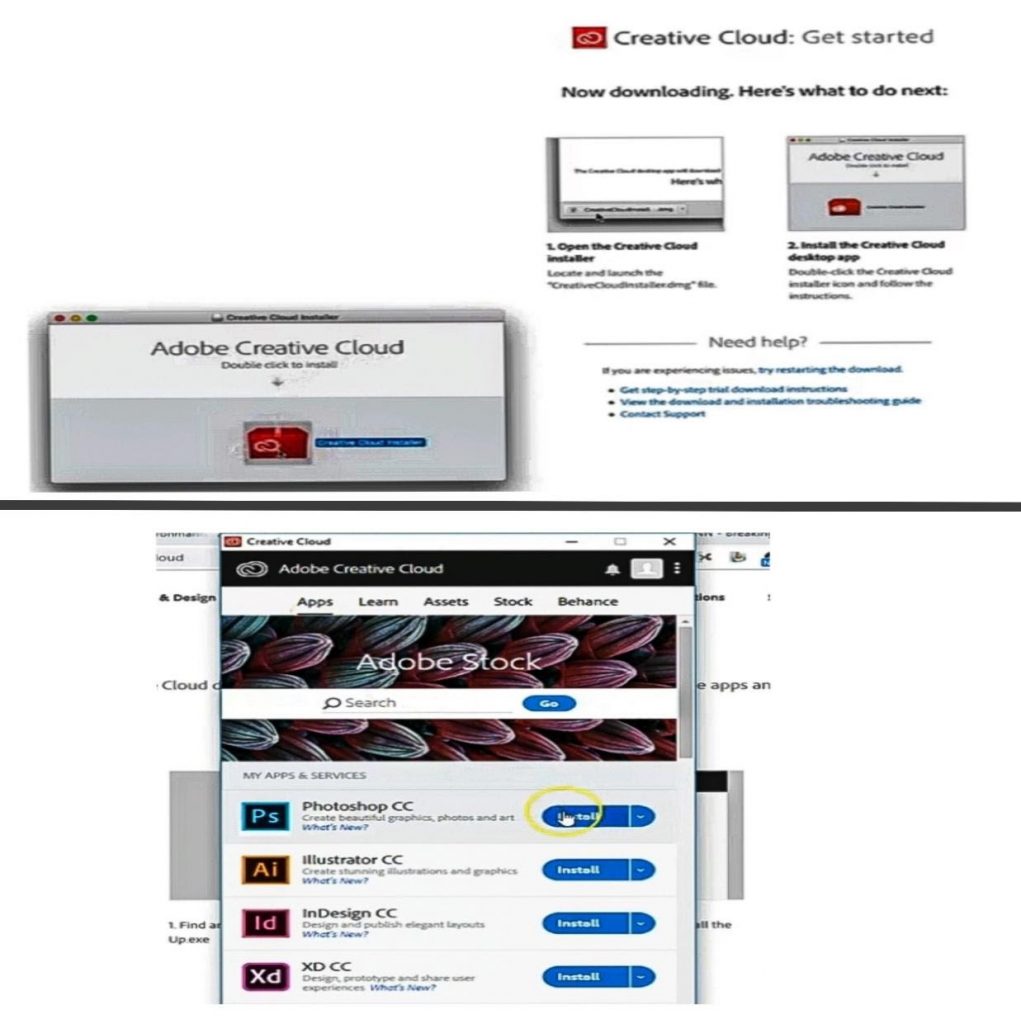
After downloading “Creative cloud,” double click on the “creative cloud installer,” and the app will start to install. Now, open the app, sign in, and choose “Photoshop CC” to install.
And, done! You are all set up to work now.
Easiest Way To Use Quick Selection Tool Photoshop?
With the “Adobe Photoshop” software installed in your PC/laptop, you are all set to edit images now. The quick selection tool is pretty easy to use. So, don’t get nervous. Just follow the steps mentioned below, and you will have your work done.
Step-1: Open The Image
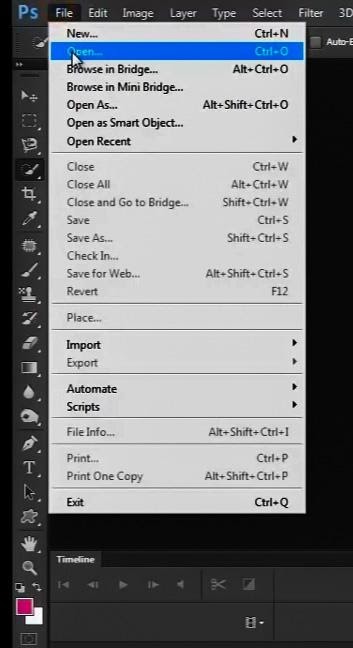
Double-tap on the app on your PC, and it will be opened. By default, there will be nothing but a black background. Now, your first task is to open a new file/image. Go to the menu bar, and you will find a bar named “file.” Click on it. Now select the “open” and choose any of the pictures from your device. “Ctrl+O” is the alternative/shortcut for this process.
Step-2: Choose The Tool

Adobe Photoshop has 60+ tools in it. First, You need to choose the quick selection tool among them to use it. Go to the toolbox. You will find an icon of a paintbrush with some dotted lines around it. Click on that. You will have two options in front of you. Choose the “Quick Selection Tool,” and you have it selected. The key “W” is the shortcut to choose this tool.
Step-3: Select Areas

When you choose the quick selection tool, it’s on the “add to Selection mode by default.” If, in any case, it’s not selected, go to the menu bar and select “add to selection.”
Now click on any part of the picture that you want to select. It will be selected immediately with a plus sign inside.
Step-4: Add To Selection
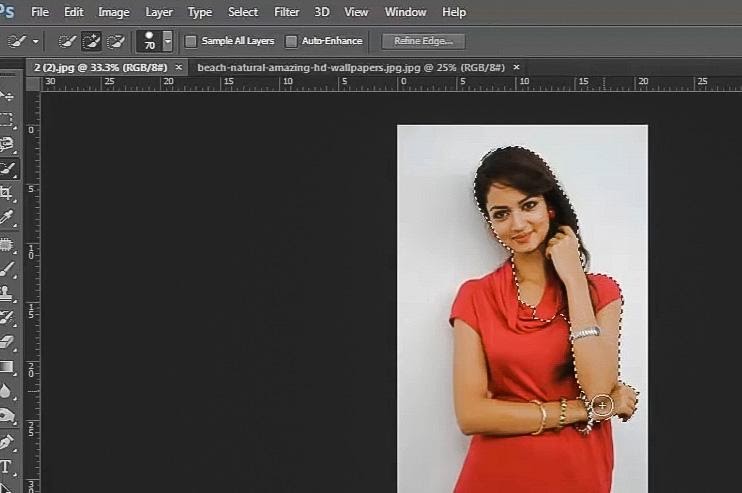
As you already have the “add to selection” mode selected, all you need to do is drag the cursor. Put the cursor in the ‘+’ sign and drag. Areas will keep selecting as long as you drag.
Step-5: Subtract From Selection

In case you have selected some unwanted areas, don’t worry, it’s fixable. Select the “subtract from selection” mode on the Options bar. Or you can use “Alt” in your keyboard to temporarily switch the mode. Hold onto the Alt and move the cursor to correct the selection.
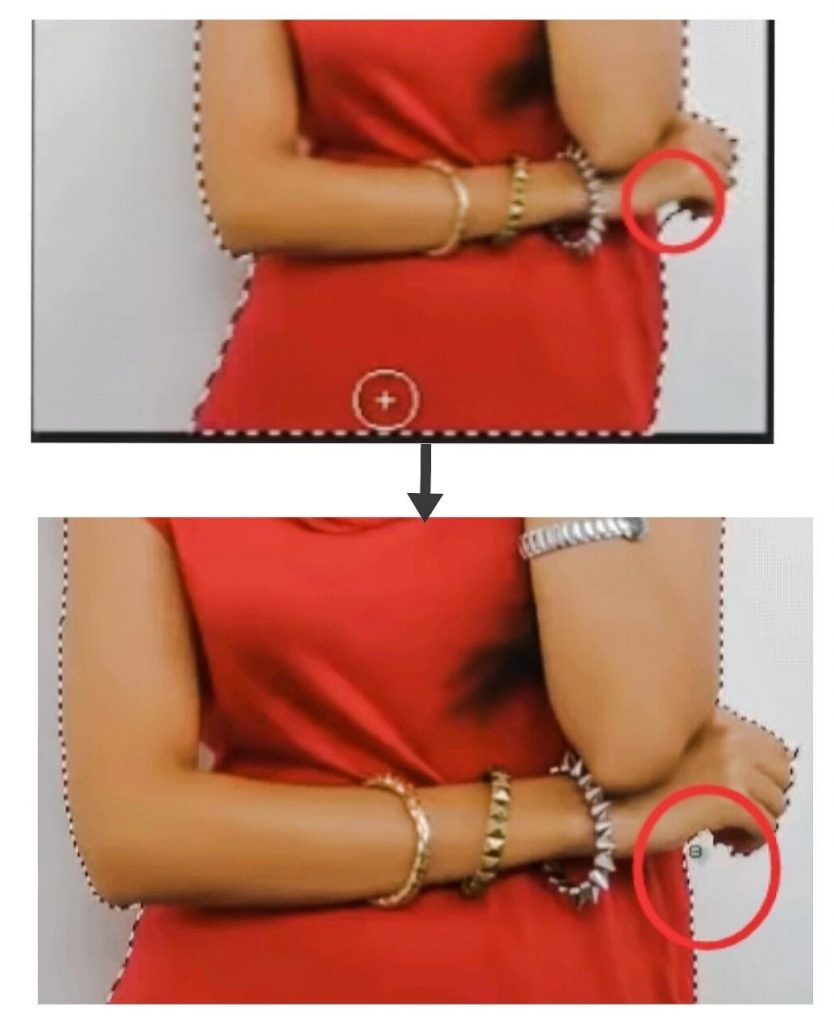
But remember, if you use the option/menu bar to change the mode, be sure to change it back.
Step-6: Resizing The Tool
You may need to change the size of the brush according to your necessity. If you are trying to select a smaller area, make the cursor smaller. Use the left bracket key ‘[to make it small and the right bracket key’]’ to make the cursor big.
Step-7: Refine Edges
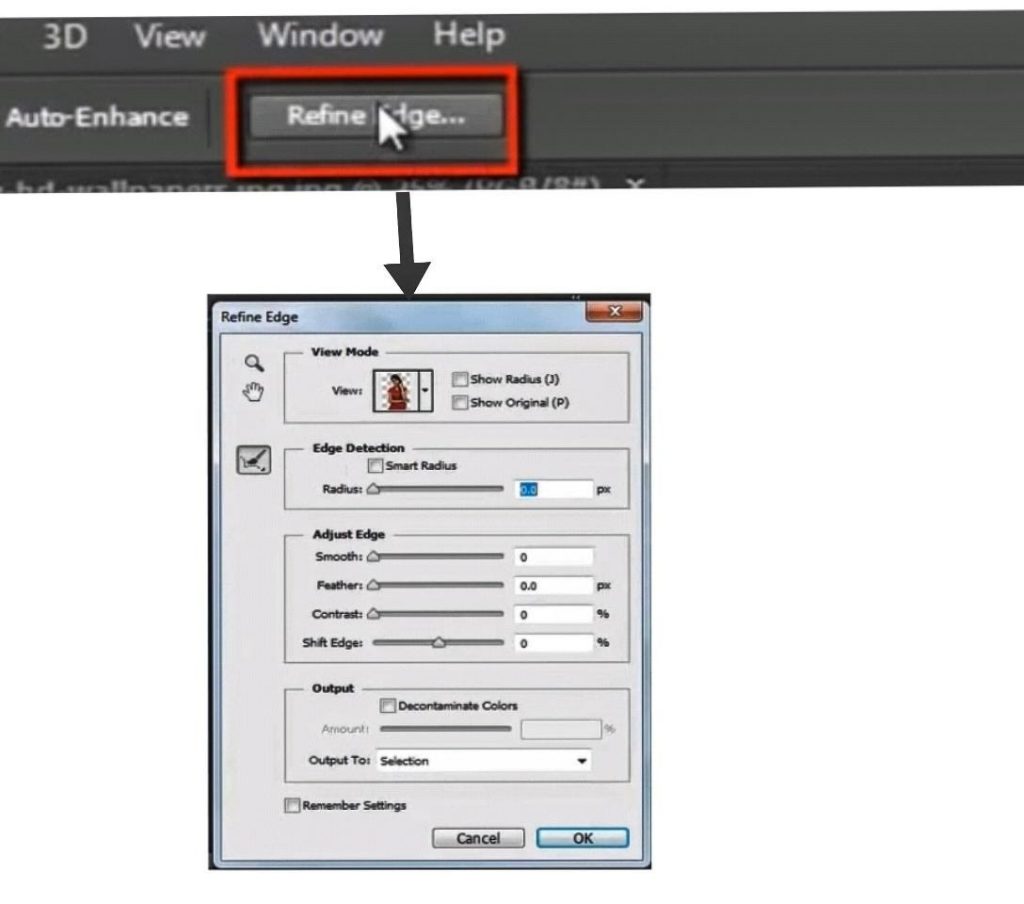
On the options bar, you will find a key named “Refine Edges.”Click on that, and a form will appear in front of you. Fill that according to your wish. After filling that up, click on “OK.”
Step-8: Make New Layer
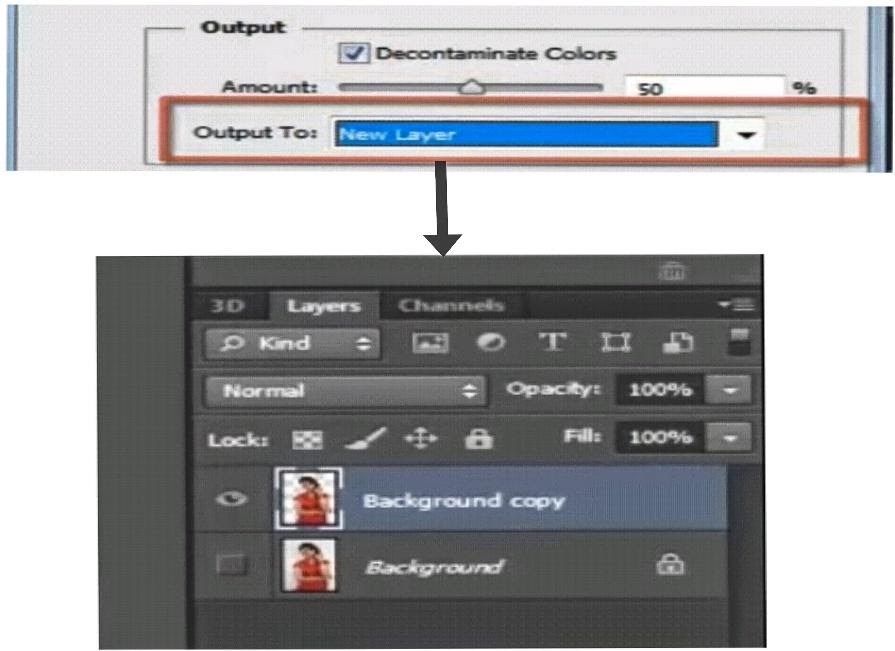
Make sure to choose “New Layer” on the output box.
Step-9: Change Background

Now, if you want to put that edited image on a different background, open that background on a new tab. Select the edited image. Drag it and leave it on the new tab.
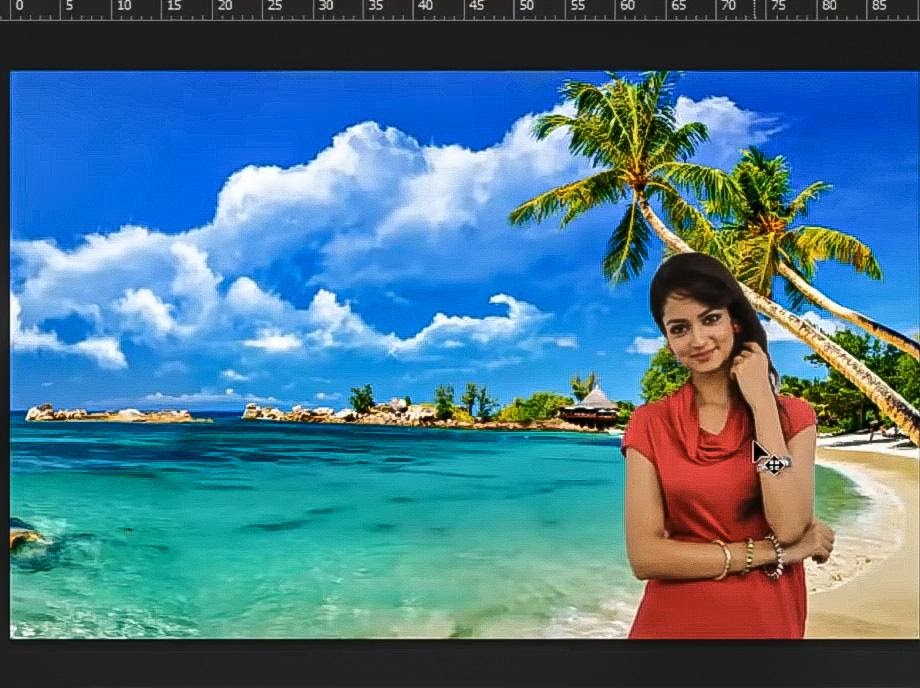
And there, you have the final result in front of you. Pretty easy, right?
Final Words
With more than 60 tools, it’s easy to get confused and scared at the same time to operate Adobe Photoshop. In this tutorial, we have tried to provide all detailed information regarding the Quick Selection Tool Photoshop. We have also shown you the downloading and installation process.
We hope this tutorial was useful to you, and you have probably learned some new things. Now, you can create your own design using the quick selection tool in Adobe Photoshop. Isn’t that exciting? We wish you a better experience in your future work.


