Professional photography has been gradually increasing in popularity in recent years. There’s a huge industry based around it and thousands of people take up photography as their livelihood every year.
According to a study, it was estimated that the global digital photography market was nearly 45 billion USD last year. This is also expected to grow to over 55 billion USD by 2030. This kind of growth shows the potential of this industry.
As the number of professional photographers increases, the competition to provide quality photography also increases. A good photographer needs to have different tricks and tips up their sleeves to stand out from the rest.
Sunglass Photography:
As a professional photographer, you often have to deal with clients who wear sunglasses during photo sessions. They may wear glasses to give a more vibrant look or use them to look better. Whatever the case, you need to factor in the effect of sunglasses.
When you are working with sunglasses, you have to deal with their glares and reflections. This may make the image distracting, and the client may not like the photo due to this. Sometimes a client may want you to change the background reflection on the sunglasses.
You need to keep in mind that, no matter how much you try, there are some imperfections in a photo that can’t be removed during the photo session. All of this can be achieved through post-processing of the picture.
Software to Use:
The pictures with sunglasses can be edited using different computer software programs during the post-processing session. At present, there are many such programs that can be used to edit your pictures in post-processing. Some of the most commonly used editing software programs are:
- Adobe Photoshop
- Adobe Lightroom
- Skylum Luminar AI
- Corel Paintshop Pro
- Canva
- GIMP
- Pixlr Editor
- PicMonkey
- DxO PhotoLab 4
- ON1 Photo RAW
- Serif Affinity Photo
- Snappa
- Capture One
- PortraitPro
- Inkscape
All of the software programs mentioned here can provide assistance to edit your images with different results. Each has its own advantages and disadvantages. Professional photographers use one or more of these software programs for their image editing. In this article, I’ll be showing you the detailed procedure to edit sunglasses in Adobe Photoshop.
Photo Editing in Photoshop:

Adobe Photoshop is one of the more commonly used software programs for editing and retouching worldwide. You can use Photoshop to remove sunglass glare and reflections. Photoshop can also be used to change the background reflection of sunglasses. All of these will be discussed in this article in detail. So, I’d suggest you go through the article, and at the end, you will also be able to edit your photos with sunglasses.
How to Get Rid of Sunglass Glare in Photoshop?
Before even starting to talk about it, you need to realize that there will be some glare in your image from sunglasses despite your best efforts. You can’t remove it completely through photography.
The quick solution to eliminate glare using Photoshop is to capture the same image with and without the glasses during the photo shoot. When you get the same copy for both cases, you can use Photoshop to stack both copies together. Afterward, mask out the glare, and you have a glare-free picture.
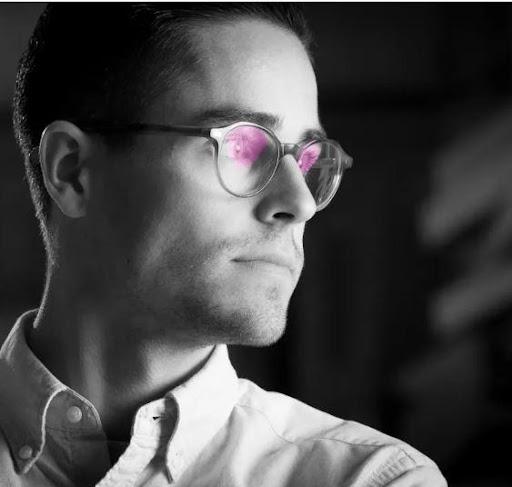
But removing glare through this route is impossible if you’re not the photographer or just someone editing a photo for your client. In such cases, you can remove the glare in Photoshop with the help of picture details.
You must remember that if the whole glass is covered by glare and no picture details are available; you can’t remove the glare from the photo.
Step 1: Open the Image with Glare in Photoshop
Open Adobe Photoshop on your computer or laptop. Then select File. From there, select ‘open’ and choose the picture you want to edit. This can also be done by dragging and dropping your image into Photoshop Canvas. It is a much faster way.
Step 2: Set the Luminosity Check Layer
Click on the ‘Adjustment Layer’ and select ‘Solid Color.’ Then choose any color that you like and set the saturation to zero. What you are selecting is simply a shade of gray. Then click ‘OK.’ Now, change the ‘Blend Mode’ from ‘Normal’ to ‘Color.’ This creates a luminosity check layer.
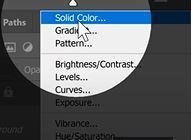
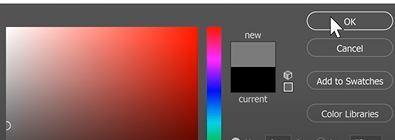
Step 3: Create a Curve Adjustment Layer
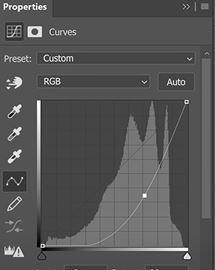
You will create a curve adjustment layer on top of the background layer. Click on the ‘Adjustment Layer’ and then select Curves. Then take a point in the middle and move it down to make the bright areas of the glare look normal. You can move it up and down a bit to get the perfect point.
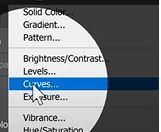
Step 4: Burn Off Over the Glasses
Select Mask and press Ctrl+I to invert it. This will turn the white mask black. This is useful when you’re burning or darkening the image.
Now select the soft round brush and set the flow of the brush. It’s recommended to keep the flow below 5% at all times. After setting up the brush, paint over the area with glare.

First, go through the hard ones. Paint it white and paint over it at your own pace. It may take some time initially, but you’ll get much faster with practice. The more you practice, the quicker you will get at burning.
Step 5: Clean Spots Using a Healing Tool
There may be some spots left after you’re done with the painting. You can take care of these spots using the Healing Brush Tool or Clone Stamp Tool.
You can use either of these two. I prefer the Healing Brush Tool over the Clone Stamp Tool because it gives me much more freedom when selecting the sample area.
Step 6: Dodge and Burn
If you want to get better results, you can create another new layer and perform Dodge and Burn on it. This is just a simple painting in Black and White. You are just going to be cleaning up your image with this. This will enhance the quality of your glare removal even more.

Keep your brush flow at 1 or 2% when performing Dodging or Burning. Paint with black in areas you want to darken. Paint the areas you want to brighten with white. Take your time when you work with it. You’ll eventually get better at it with experience.
Step 7: Coordinate the Color
Turn off the luminosity check layer first. You’ll observe that there’s a color mismatch. To fix this issue, create a new layer and name it ‘Color.’ Select the layer, grab your brush, and keep your brush flow at 5 to 10%. You need to keep it at 5% at first. Then you can increase the brush flow gradually.
Before beginning, select the Eyedropper Tool to ensure that the sample is ‘Current & Below,’ and the sample size is ‘3 by 3 Average’ or ‘5 by 5 Average’. Now, grab the brush and change the Blend Mode from ‘Normal’ to ‘Color.’ This will ensure the brush only affects the color.
Now take a sample and begin painting on the areas where there is a color mismatch. This wouldn’t have looked okay had you selected 100% brush flow. This is the reason you need to keep the brush flow low.
Not all areas require color matching, as some of the areas were already matched. Use only where color matching is required.
Step 8: Change the Curve
After changing the color to get rid of the mismatch, go to ‘Adjustment Layer’ and select ‘Curves’. From here, select Blue. This is done because our faces are a bit yellowish and Blue is the opposite of Yellow. Now change the amount of Blue. After you’re satisfied with your adjustment, press Ctrl+I to invert it.
Step 9: Paint the Eyes
To balance the whiteness of the eyes, select the brush and set the brush flow to 100%. Then go over the eyes to make them look white.
Then select black and paint the retina to retain its blackness. It is up to you how much you want to modify them.
There may still be some spots after you complete this step. If there are any, get rid of them using the Healing Brush Tool. Otherwise, Save the image, and you are done with it.

How to Get Rid of Sunglass Reflections in Photoshop?
A common issue when taking photos of a person wearing sunglasses is the reflection from the photographer’s side. Sometimes an unwanted reflection can ruin an otherwise perfect picture. In the case of glare removal, you can do so by following the steps outlined above. But in the case of sunglasses reflections, you need to do things a bit differently.
Here are the steps for how you can get rid of unwanted reflections from sunglasses in Photoshop.
Step 1: Open the Image with a Reflection
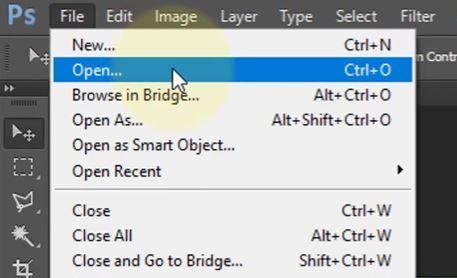
Just like before, open Adobe Photoshop on your computer and select File. From there, again, select ‘Open’ and choose the photo you want to edit. Dragging and dropping your image into Photoshop Canvas makes it much faster.
Step 2: Select the Left and Right Sides of the Sunglasses
You have to select the areas using the Pen Tool. Select the tool from the sidebar or press the ‘B’ keyboard shortcut. The right and left glasses need to be separated. So select them separately.
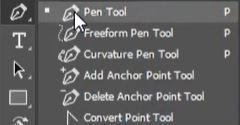
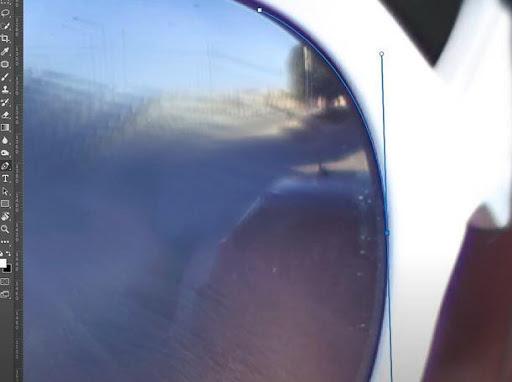
Let’s first start with the right side and then select the left side. Take your time while selecting; you need to select the area properly to get accurate results. If there is an edge, you need to stay inside the glass.
Use only the regular Pen tool and not the others. You can adjust the tool to select the area more precisely. Now, go to the Paths tab, and you’ll see two works paths. One is for the right, and the other is for the left. You can rename it if you want.
Step 3: Apply the Gaussian Blur Filter
Gaussian blur is a widely used filter in Photoshop. It’s very easy to use and can help you in different scenarios. This reduces noise and grain considerably. You can use a Gaussian filter to soften the image and also control the amount of blur in the photo.
Press Ctrl and click on the work path to select it. Go to Filter and choose Blur. Then, again, select Gaussian. A tab will be opened where you can select the amount of blur to apply. You should be applying a blur at the edges of the sunglasses.
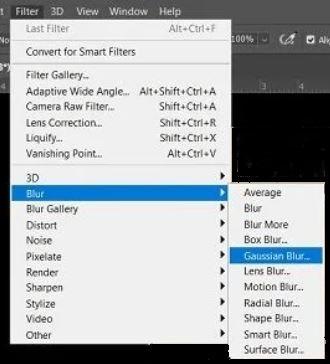
If some areas still require extra blur, you can always use blur manually to blur out those areas. Save the selection as a channel by pressing Ctrl+D. Repeat the procedure for both eyes.
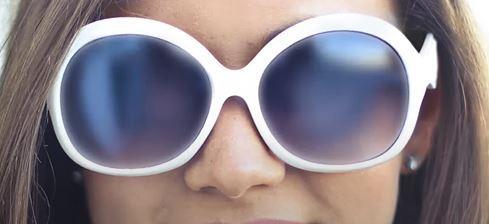
Step 4: Get Rid of Blur in Selected Areas
In some of the areas, you would want to keep the details. Remove the blur in such cases to make the area details visible. For example, if some edges of the glasses, hair reflections, etc.
Make a copy of the layer and call it ‘blur’. Now create a Mask layer by clicking on the Mask button. Take the brush and make the background color black. Make sure to decrease the brush flow to below 10%. Now, paint over the areas where you want to remove the blur.
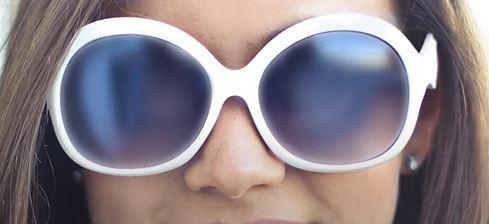
Step 5: Use Sampled Colors to Paint
Create two layers; One for painting the sunglasses’ reflection and the other for keeping the sample colors.
Select the brush and set the flow and hardness to 100%. Now use the brush to sample the colors and keep them in the sampling layer. Before sampling, make sure that in the eyedropper tool, the sample size is ‘Point Sample’.
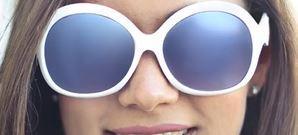
Now make a Mask and use the sampled colors to apply it to the glasses. This is up to your discretion when it comes to mixing the sampling colors. You can also experiment with the brush flow rate.
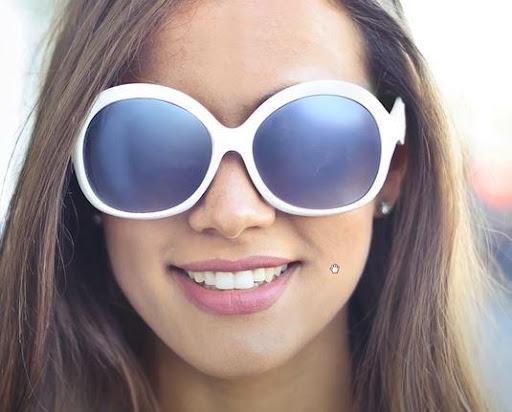
After you’re done with the painting, you can also change the opacity to get the perfect level.
Step 6: Add Contrast to the Image
Click on ‘Adjustment Layer’ and select ‘Curves’. Now, adjust the curves as much as you like until you are satisfied with the results. Repeat it for the other eye as well.
After you are done with this step, you will see that you have successfully removed the reflection of the sunglasses from your picture.
How to Photoshop Someone’s Sunglasses?
In some cases, your client may want you to add sunglasses to the photo that weren’t present during the photo shoot. In such cases, Photoshop can assist you in inserting a sunglass into the photo. In this section, I go over the steps for adding sunglasses to someone in Photoshop in great detail.
Step 1: Open the Image of the Model and the Sunglasses
To begin, locate a suitable photo of a sunglass that you can use. If you search on the internet, you can find many photos of sunglasses, and you can select one from there. After you’ve selected the sunglasses photo, open it on your computer. Select File and again select ‘Open’. Choose the sunglasses photo.
You can do it by dragging and dropping your picture into Photoshop Canvas. Open your client’s image the same way mentioned above.
Step 2: Remove the Sunglasses’ Background
Go to the sunglasses photo and you have to remove its background. You can use either the Magic Wand Tool or the Quick Selection Tool. The selection of a tool depends on the complexity of the background.
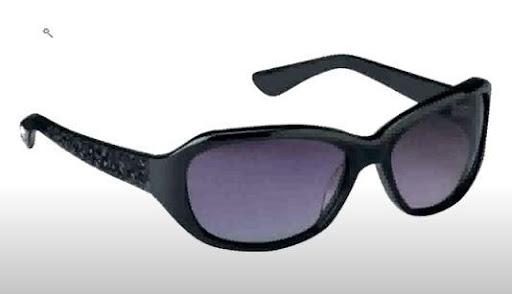
An easier background can be removed with the Magic Wand Tool. On the other hand, the Quick Selection Tool is used for images with complex backgrounds.
You need to unlock the layer and then select the sunglasses with the Magic Wand Tool. Afterward, clear everything in the background and you are left with only the sunglasses.
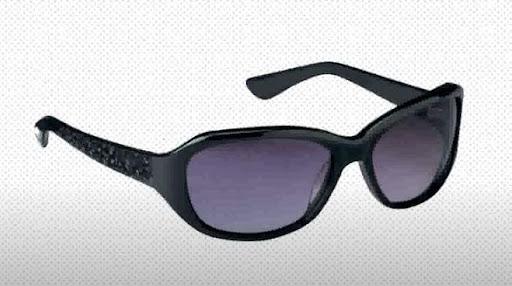
Step 3: Resizing the Sunglasses
In this step, you are going to resize the glasses so they fit your client. First, copy the sunglasses image and paste it into your client’s photo.
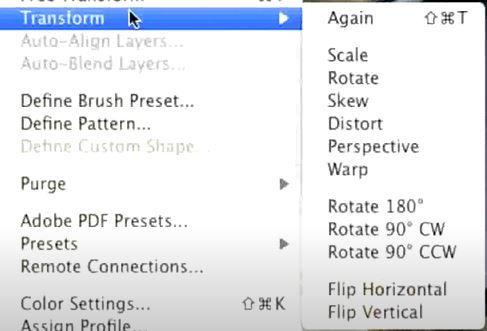
Now, resize the photo using Transform in Edit. From there, you can rotate, scale, flip, etc. You may use one or more of these features to resize the image to fit your client.
Step 4: Fit the Sunglasses and Erase Unnecessary Parts
After you’ve resized your picture, you can take the image to your face and fit it properly. Now you can see that some parts of the sunglasses are visible and do not correspond to the subject’s position.
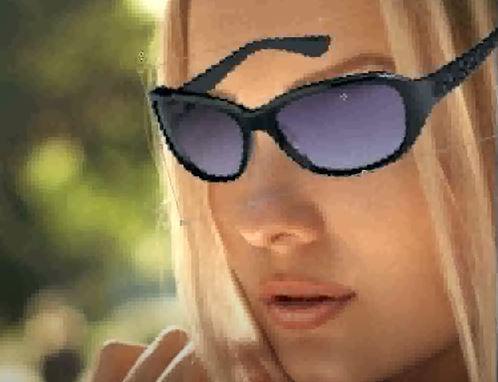
For this, take the Erase tool and remove the unnecessary parts. Do this step carefully, as you don’t want to remove crucial areas of the face or sunglasses.
Step 5: Apply a Brush to Adjust the Sunglasses
In this final step, you need to touch up the surface of the glasses. Select the Brush Tool and select a color that matches the sunglass’s color. Now lower the flow of the brush and brush it over the surface. You can change opacity and brush flow according to the image. When you are satisfied with the results, save the image, and you are done with it.

Closing Thoughts
Now that I’ve talked to you in detail about editing sunglasses in your photos easily in Photoshop, it is safe to assume that you have a very firm grasp of these concepts. You can now follow these steps to make the perfect edit to your image.
Remember that you don’t have to apply all the edits to a single photo. So use your own discretion when working with your picture containing sunglasses.
Again, this is not the only method to edit images with sunglasses. If you go online, you will find that different people use different techniques. But if you observe more closely, you’ll find that more than 90 percent of the steps are similar in all the cases.
So if you can follow through with these edits I’ve discussed, I can guarantee that you will come back with some amazing photos that will grab your client’s attention and delight them.
If you still have issues and require professional help with your picture, you can always take assistance from Clipping Path Service.
Who is Clipping Path CA?
The Clipping Path CA is world-leading outsourcing photo editing and pro picture editing company based in Canada. They assist you to grow your business and ROI. They professionally handle your image editing solutions in a timely and cost-effective manner. They have assisted thousands of clients globally and here in North America. Nine out of ten clients who have taken their service have recommended them.
Why ‘Clipping Path CA’ is the top sunglasses photo editing company?
Clipping Path CA is a professional image editing and retouching company. They have 120+ editing experts of their own. They can provide sunglasses image editing services to clients who have issues touching up their pictures. Clipping Path CA is a photographer-friendly platform that delivers services at a reasonable price and with a fast turnaround time. Client satisfaction is always their main target.
Photo Retouching is a service that offers perfect and flawless photos and transforms them into attractive images with the Photoshop Service by removing glare and reflections from images. It is one of the most demanding services in photo editing services. Images become more appealing and focused with the addition of photo retouching.
Questions and Answers for Sunglasses Photoshop
How do I take pictures of sunglasses without reflection?
The following tips may help you reduce reflection from sunglasses during a photo shoot:
✔ Focus on the angles
✔ Adjust your glasses
✔ Keep the light in the background.
How long does it take to edit sunglasses into an image?
When you are new to this type of editing, it may take time to edit a single image (around 30 minutes). But once you’ve had some experience, you can edit them quickly. Some images will require less editing than others due to less glare and reflection.


