Model images for retouching are photos we generally use to practice or demonstrate photo editing skills. These images usually feature real people, clear skin details, and proper lighting, helping us to practice. We can use them to learn skin retouching, color correction, enhancement, and detail cleanup without client pressure.
Of course, clients’ photos do not allow trial and error. So we, as photographers, retouchers, and designers, want realistic photos to improve our editing skills. And that is where Model images give us freedom to experiment and refine our workflow.
But where can we get the model images for retouching? How to retouch them for the enhancement of practice? Let us learn it comprehensively in today’s guide.
Why Photographers and Retouchers Need Model Images for Retouching?
As we have already given you a hint, photographers and retouchers rely on model images to practice and improve their skills. Obviously, client photos don’t allow mistakes, even a single one. But of course, model images do. They give us a safe space to learn advanced techniques for retouching, different photo editing styles, and approaches. For instance, skin smoothing, dodge and burn, or color grading.
On top of that, model images help us build a strong portfolio. Before showing work to clients, we can create realistic before-and-after examples. It shows our editing ability and skills without risking the dissatisfaction of our clients.
Moreover, model images also allow us to try software and tools. Whether it’s Photoshop, Lightroom, or another editing tool, we can experiment with retouching methods and tools. So, ultimately, it helps us work faster and more efficiently on the real projects of our clients.
Finally, model images let us prepare for tutorials and client demos. With the help of model images, we can show step-by-step edits to our customers or the learners. So, it can help others learn and build credibility when you are offering retouching services.
Types of Model Images Used for Retouching
You know all model images are not equal for retouching practice. You need to choose the right type of model image to improve your skills and produce professional results. There are many types of model images we generally use in retouching. Each of them serves a specific purpose.
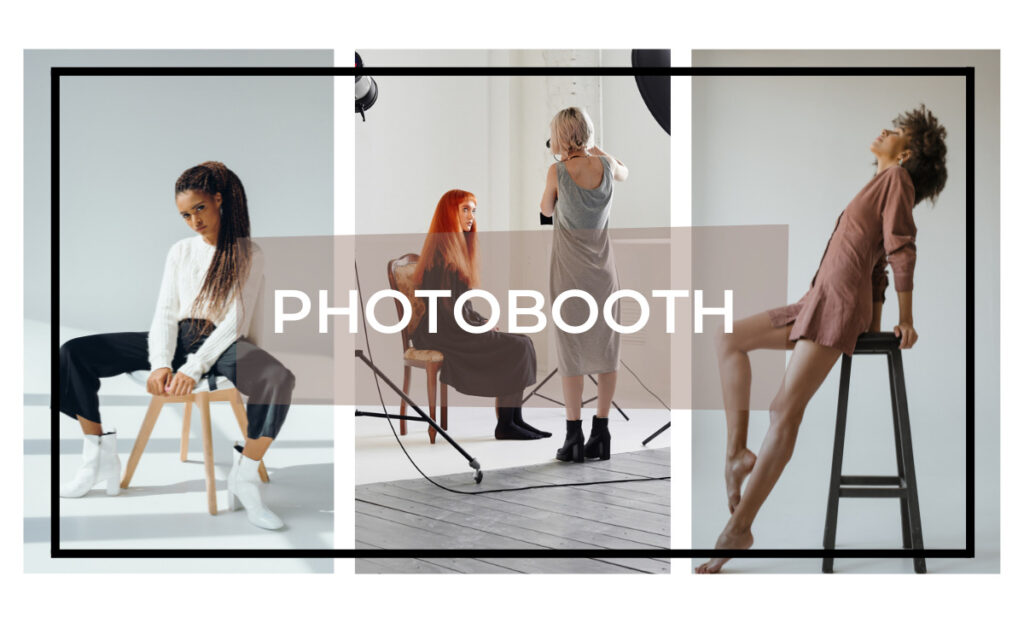
1. Portrait model images
It is the most common type of image you can use for retouching. These images capture details on the face. For instance, skin texture, eyes, lips, and hair. Here, we can practice techniques such as skin smoothing, blemish removal, and tone correction. If you are a beginner learning to balance realism with enhancement, you should use portrait model images.
2. Beauty and fashion model images
Beauty and fashion images are typically high-end studio shots. That is why they provide challenging lighting and flawless skin. So, if you want to practice advanced retouching techniques, you can use beauty and fashion model images. Advanced techniques can be like frequency separation, dodge and burn, and color grading. Fashion images also teach you how to maintain natural skin texture, enhancing the overall look.
3. Lifestyle and editorial images
Lifestyle or editorial model images often include natural light, movement, and background elements. Retouching these images helps us practice background cleanup and color consistency. They are essential for editors working on magazine spreads or social media content.
Best Image Formats for Retouching Practice
When you want to practice retouching on model images, you will need to choose the right format of those images. It is necessary to ensure effective retouching. That is because it lets you understand how many details in the image you can work with. Moreover, it also determines how flexible your edits can be and how realistic your final results will appear. So, check it out below.
1. RAW images
RAW files of the model images are best for retouching. They contain all the data captured by the camera sensor. So, it gives you maximum flexibility in exposure and skin adjustments. It also allows you to recover shadows and fine details that you may often lose in compressed formats. That is why you should always prioritize RAW model images for serious practice on retouching.
2. JPEG images
The JPEG file format is a compressed file. Actually, they are widely used online. Model images of this file format are suitable for beginners. And also for those instances where high-end editing is not necessary. They are useful for practicing basic retouching, color correction, and minor skin adjustments.
3. TIFF files
It is another file format that you can use for retouching. Unlike JPEGs, TIFFs retain all image details. That is why they are ideal for multi-layer editing in Photoshop. This file format of the model images allows us extensive adjustments without losing quality.
4. Resolution and color profile
You should also pay attention to resolution and color profile, along with the file format. That, of course, also has a reason. Here they are
- High-resolution images provide more detail for skin, eyes, and hair
- The correct color profile, like sRGB or Adobe RGB, ensures colors remain accurate during editing.
But in contrast, low-resolution images can make retouching harder and reduce the quality of your final work.
Best Free Sources to Download Model Images for Retouching
Well, if you are trying to find model images for retouching, you can get them from online free sources. Free resources provide high-quality images that you can use for practice without worrying about licensing issues. Below are some of the best sources.
1. Unsplash

Unsplash offers more than thousands of high-resolution portrait and lifestyle images. You can search for specific model photos and use them freely for practice. Here, you can download model images without registration. On top of that, these images are suitable for both beginner and advanced retouching practices.
2. Pixabay

Pixabay also provides a large collection of free model images. Its database includes portraits and fashion images. Keep in mind that Pixabay images are usually JPEGs. So, they are ideal for basic retouching practice. The platform also has a file in high resolution. It makes them suitable for learning skin, hair, and background editing.
3. Pexels

You can also get model images from Pexels. From here, you can download fashion and lifestyle photography. You can do it for free and does not require attribution. So, you can use this platform for building a portfolio or practicing retouching techniques.
4. Flickr

The last one is Flickr. This platform also offers a wide variety of user-uploaded model images under Creative Commons licenses. In this platform, some images require attribution, and others are free for personal/commercial use. So, if you are a beginner or amateur, you both can both use this platform for model images according to your needs.
Paid and Professional Sources for Model Images
Well, if you want high-quality model photos with more variety, you can use paid and professional sources. Free sources are great for beginners. But professionals often prefer these images to ensure consistency and commercial safety.
1. Adobe Stock

Adobe Stock offers thousands of high-resolution and professionally-shot model images. It includes portraits, fashion, beauty, and lifestyle images suitable for advanced retouching. The images come in RAW or high-quality JPEG formats. It makes them perfect for practicing complex edits. Adobe Stock also provides clear licensing for commercial use.
2. Shutterstock

Shutterstock is a popular paid platform. It has a vast library of studio-quality portraits and fashion images. You can search by model type, pose, or lighting. So, ultimately, it helps you practice specific retouching techniques. On top of that, Shutterstock images are well-suited for portfolio projects, tutorials, or client mockups.
3. Getty Images

Getty Images offers premium model images. The platform offers images that are generally used in magazines and advertising. These images feature professional lighting, makeup, and styling. So, you can use these images for advanced retouching practice. Getty’s licensing ensures you can safely use images in tutorials or portfolio displays without legal concerns. Here is a quick overview of the free and paid resources for model images for retouching.
| Source | Type | Image Quality | Formats Available | Best For |
|---|---|---|---|---|
| Unsplash | Free | High-resolution portraits and lifestyle | JPEG | Beginner to intermediate retouching practice |
| Pixabay | Free | Portraits, fashion, and editorial | JPEG | Beginners practicing skin, hair, and background edits |
| Pexels | Free | Portrait, lifestyle, and fashion | JPEG | Portfolio building and general retouching practice |
| Flickr | Free | Varied quality, and user-uploaded | JPEG and some RAW | Practicing edits on different photography styles |
| Adobe Stock | Paid | Professional high-resolution studio images | RAW and JPEG | Advanced retouching, portfolio, and client demos |
| Shutterstock | Paid | Studio-quality portraits and fashion | JPEG, and some RAW | Advanced retouching, tutorials, and portfolio |
| Getty Images | Paid | Premium magazine/advertising images | JPEG and RAW | Professional-grade practice and portfolio presentation |
| Specialized Retouching Packs | Paid | Curated RAW and layered PSD files | RAW and PSD | Structured practice, beauty and fashion edits, and advanced training |
How to Prepare Model Images for Retouching?
Now that we have the model images, we have to prepare them for professional retouching. Without it, even advanced retouching techniques can look unpolished. So, follow the steps to prepare your model images for retouching.
Step 1: Organize your files
First of all, you will need to organize your images before editing. It will help you in preventing confusion. That is especially effective when working with multiple images or clients.
Here is how you can do so.
- First, you have to create separate folders for raw images, edited versions, and final exports.
- Then, you should use descriptive naming conventions. For instance, modelname_date_type.jpg.
- Lastly, you should group images by difficulty level.
Step 2: Check image resolution and color profile
As we have already discussed, this is a very crucial step. You should check the image resolution and color profile to make the retouching process easier and more precise.
Check it out below.
| Aspect | Recommendation | Why It Matters |
|---|---|---|
| Resolution | At least 3000 pixels on the longest side | It ensures great detail for skin, hair, and eyes |
| Color Profile | sRGB for web and Adobe RGB for print | It ensures accurate colors during editing |
| File Type | RAW preferredJPEG for practice | RAW allows full controlJPEG is suitable for beginners |
Step 3: Import properly into editing software
You can use professional software for editing. For instance, Adobe Photoshop or Lightroom. Import the images into the editing software. You have to ensure the image retains its original quality during import. Moreover, you should avoid automatic compression or resizing.
Step 4: Apply non-destructive editing
This step is essential for experimenting without losing the original image. You should duplicate layers before editing. Moreover, you should use adjustment layers, masks, and smart objects. That is because it allows you to undo changes easily and test different techniques.
Read more: How to create a clipping mask in Photoshop
5. Basic pre-editing checks
Before starting detailed retouching, you should perform basic adjustments. For instance,
- Crop and straighten the image.
- Remove minor distractions.
- Adjust white balance and exposure.
Essential Retouching Techniques for Model Images
Now, let us move ahead with the retouching of the model images. Generally, professional retouching uses different techniques to enhance images, keeping them natural. In this section, let us understand these techniques to retouch images effectively.
1. Skin retouching
Skin retouching is a fundamental technique in portrait and fashion photography. It helps to enhance complexion, preserving texture. Professionals often use frequency separation to smooth uneven areas without losing pores. Here, you should avoid over-editing as it can result in an artificial appearance.
2. Dodge and burn

Dodge and burn is a method for manipulating light and shadow to add depth to facial features or body contours. Professional editors generally use this technique in beauty and fashion images. Through this technique, when you understand where to apply highlights and shadows, you can turn your flat model images into an impressive one.
3. Color correction and tone adjustment

Color correction ensures consistent skin tones and accurate lighting. With this technique, you can adjust white balance, curves, and exposure to achieve a balanced look. It is an essential technique for fashion photography. That is because the color here impacts overall image quality and ensures client satisfaction in most ways.
4. Hair and eye enhancements
In your model images, retouching hair and eyes improves focus on key facial details. Editors enhance brightness and contrast to draw attention to eyes or tidy stray hairs. You should gain knowledge or practice to do the enhancement as it requires. That is because if you overdo it, it can appear unnatural.
5. Background cleanup

Background adjustments remove distractions and improve composition. Professionals use masking and blending techniques to create a clean visual presentation. It ensures the subject remains the focal point. It is particularly important for studio portraits and product-adjacent images.
Read more: How to Change the Photo Background to White
| Technique | Purpose | Key Consideration |
|---|---|---|
| Skin Retouching | Smooth skin, keeping texture | It preserves natural pores |
| Dodge & Burn | Add depth and dimensionality | It avoids over-lightening shadows |
| Color Correction | Balance tones and hues | It maintains realistic skin tones |
| Hair and Eye Enhancements | Emphasize facial details | It keeps subtle and natural |
| Background Cleanup | Remove distractions | Blend with the subject efficiently |
What Are The Levels of Retouching?

You should always keep in mind that model image retouching is never a one-size-fits-all solution. Your retouching level varies depending on your project, client requirements, or skill level. That is why the retouching level generally ranges from basic corrections to high-end editorial adjustments. Let us try to understand the levels of retouching here.
1. Basic retouching
First comes the basic retouching. This retouching level mainly focuses on minor corrections to improve the overall look of the image. However, it ensures that retouching does not alter the natural appearance of the model in the image.
If you are learning image retouching or need retouching for social media or small portfolios, basic retouching will be ideal for you. It teaches you to enhance images efficiently without over-processing.
Basic retouching for model images includes the following.
- Removing visible blemishes, stray hairs, and dust spots.
- Adjusting exposure, contrast, and white balance.
- Preserving skin texture and addressing obvious distractions.
2. Intermediate retouching
As for intermediate retouching, here you do subtle enhancements to improve the visual appeal of the image, but keep the natural impact. An intermediate level of retouching is suitable for commercial photography, client presentations, and professional portfolio work. Through this level of retouching, you can learn to balance enhancement with natural aesthetics. It is, of course, a critical skill in professional retouching.
Here is what is included in the intermediate level of retouching.
- Smoothing skin using non-destructive methods
- Retouching, maintaining natural pores.
- Applying dodge and burn to enhance facial contours and depth.
Performing minor color grading.
3. Advanced or high-end retouching
The last level is the high-end retouching. Professionals use this level of retouching for editorial, fashion, and advertising projects where perfection is a must.
High-end retouching is required for magazines, fashion campaigns, advertising, and high-profile portfolios. This retouching level ensures that images are flawless yet realistic. That is why it is suitable for commercial and editorial use.
The following are included in the advanced or high level of retouching.
- Using advanced techniques like frequency separation, advanced color grading, and detailed lighting adjustments.
- Refining hair, eyes, teeth, and facial features.
- Correcting and polishing backgrounds.
Here is an overview of the retouching levels for model images.
| Level | Changes in Image | Purpose / Use | Skill Requirement |
|---|---|---|---|
| Basic | It removes visible blemishes, adjusts exposure, and color | Social media, small portfolios, and beginner practice | Beginner |
| Intermediate | It enhances skin, depth, color, and facial features subtly | Client projects, commercial work, and professional portfolios | Intermediate |
| Advanced / High-End | Complete refinement of skin, features, lighting, and background | Editorial, fashion, advertising, and high-end portfolios | Professional and Advanced |
Common Mistakes When Retouching Model Images
Now that we have our retouching technique and level for model images, there are some common mistakes you need to be aware of. That is because understanding these common mistakes helps you produce professional results and maintain credibility in client work or commercial projects.
1. Over-smoothing skin
First, and most common mistake is over-smoothing skin in model images. Sometimes, you may feel like you have created flawless skin. But it removes natural pores, shadows, and texture. That is why it gives the subject a plastic appearance. So, you have to be careful not to over-smooth the skin in the model images.
2. Ignoring color accuracy
Next is ignoring color accuracy. Your mistakes can occur when you oversaturate, apply poor white balance, or make inconsistent adjustments in multiple images. You have to maintain true-to-life colors in the images. It shows your skill and makes your editing trustworthy.
3. Overusing dodge and burn
Dodge and burn is an essential technique for adding depth and dimension. However, overuse can create artificial facial contours or harsh highlights. In this case, you should use low-opacity brushes and layered adjustments.
4. Over-editing hair, eyes, or teeth
Excessive edits of hair, eyes, or teeth in the model images can be distracting. And that is one of the common mistakes of the editors. Too many edits can draw attention away from the overall composition. That is why you should aim for subtle improvements, ensuring that these features enhance the image naturally.
5. Neglecting background cleanup
The last one is neglecting background cleanup. Dust spots, stray objects, or uneven lighting can reduce the overall impact of an image. Professional retouchers clean up the background, preserving natural depth. It ensures the subject remains the focal point.
Get Natural-Looking Results with Clipping Path CA
When to Outsource Model Image Retouching?
Let us be honest here. Not every photographer or business has the time, tools, or expertise to handle every image edit in-house, right? Sometimes you may need professional help and outsource model image retouching. But when should you outsource your model images for retouching? Have an overview below.
① Editing model images, especially high-resolution portraits or fashion shots, can be time-consuming. Outsourcing frees up your schedule, allowing you to focus on shooting.
② If you need to generate hundreds or thousands of images per shoot, you can outsource for touching up your photographs. They can ensure fast and professional results.
③ Professional retouching services have skilled editors who are trained in advanced techniques. So, with their help, you can ensure images that meet industry standards.
④ Outsourcing provides high-quality, client-ready results, minimizing the risk of mistakes. You can prevent inconsistencies that could affect your reputation.
Why Choose Clipping Path CA for Professional Retouching?

So, if you want high-quality model image retouching, choosing the right service provider is a must. And here, Clipping Path CA stands out as a trusted service provider for photographers and for anyone who needs professional image retouching.
Clipping Path CA has a team of experienced editors trained in advanced retouching techniques. They handle every image with precision and attention to detail. Their expertise ensures your model images look impressive yet natural. On top of that, Clipping Path CA offers quick and reliable delivery, allowing you to meet client expectations.
In their service, every image passes through a strict quality control process. They ensure consistency, accuracy, and adherence to client specifications. This focus on detail helps you avoid common mistakes and maintain a professional portfolio.
Contact Clipping Path CA for Professional Retouching
Conclusion
So, all in all, high-quality model images for retouching are essential for photographers and editors to practice skills or deliver professional results. You just need to choose the right sources and follow proper techniques to enhance your workflow. If needed, you can take help from professional service providers like Clipping Path CA. They will help you maintain quality, efficiency, and a strong professional portfolio.
Frequently Asked Questions [FAQs]
Do you have any more questions about model images for retouching? Let us try to answer some of your common queries through the questions people mostly ask.
1. How to professionally retouch photos?
You will need to use high-quality images. After that, ensure correct exposure and colors. Enhance skin, eyes, and hair subtly. If you need image retouching for ecommerce businesses, contact the professional editors or service providers.
2. Can ChatGPT retouch photos?
Actually, no. ChatGPT is not able to retouch images as professional editors can. Instead, they can guide workflows and provide step-by-step instructions. It can suggest retouching techniques to you. You should keep in mind that actual photo editing requires software or professional services.
3. What is the 400 rule in photography?
In photography, the 400 rule in photography helps prevent blurry photos. In this rule, you have to divide 400 by your lens focal length. It will help you find the slowest shutter speed that you can safely use when you are handhelding the shooting.