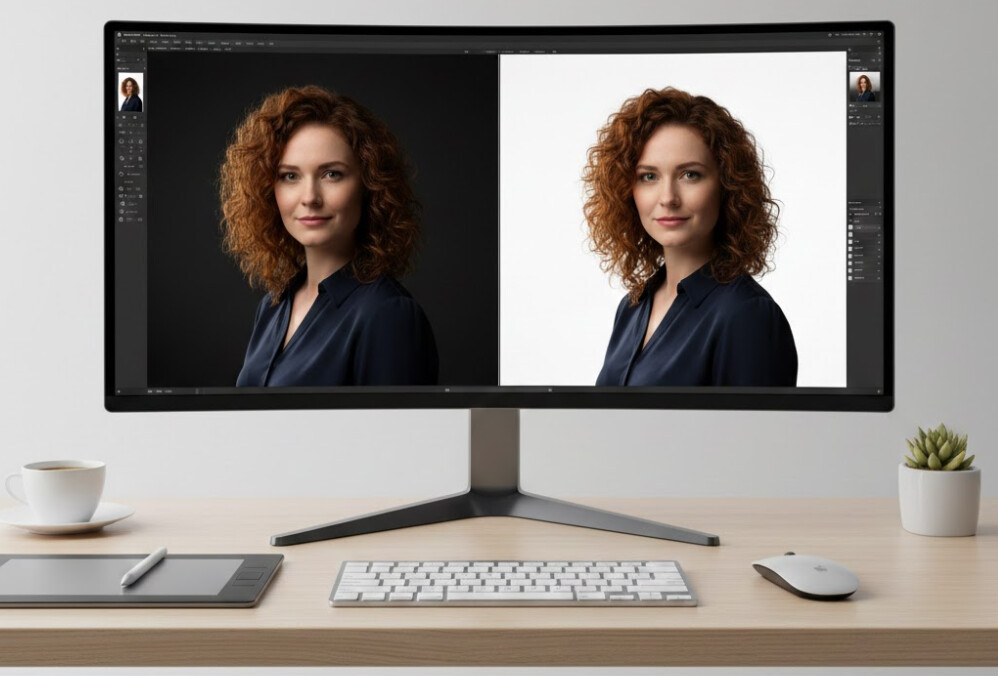
Photo editing is crucial for professionals and can be very important in various general purposes. So it may be essential for you to know how to photoshop someone into a picture.
So hopefully, you will be glad to know that you can easily edit a photo in photoshop. Photo editing is more fun with Adobe Photoshop, and you can do it for free using Photoshop CC.
Generally, photo editing seems very difficult for newbies or unprofessional. But once you know how to photoshop a picture with proper instructions, you will get the way easier and smoother later on. All you need to pass the way is just enough patience, perseverance, and proper direction.
So if you want to learn how to photoshop pictures for free, this tutorial article has been created for beginners, and it contains all the necessary information you need to get. So let’s jump into the entire article and discover how to edit a picture.
What you will learn
This photoshop tutorial is made for beginners with very simple guidelines where we will discuss the information regarding the topic of how to photoshop someone into a picture for free.
These step-by-step guidelines will allow you to edit a photo in photoshop in the easiest ways. In this tutorial, we will also focus on extracting a person or an object from a picture and adding them to another image.
Therefore, this process is not only for extracting and adding a person into a photo, but you can also add or extract any object or animal in photoshop following this process.
So let’s go for it.
Photoshop someone into a picture
First of all, read this article very carefully and then try to do it practically by following these step-by-step guidelines. So let’s check out the instructions on how to photoshop pictures, enjoy your job, and get your results quickly and easily.
Step-1: Get your image on Photoshop
This is the first step where you have to select two different images to work on. When it comes to selecting the images, it’s essential to be aware of the three basic aspects: perspective, angles, and resolution.
Because the more similar the aspects of the two pictures, the more natural and perfect your composition will be. After selecting the images:
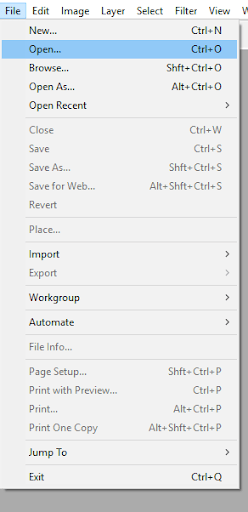
▶️Open them on Photoshop.
▶️Go to the File menu and select “open .”
▶️Pick your required images and open them.
Step-2: Create a duplicate layer
In this second step, create a duplicate layer of the background layer so that the original image can remain safe from any changes that will be done later on. Creating a duplicate layer is a common thing you have to do in photoshop while editing any photo.
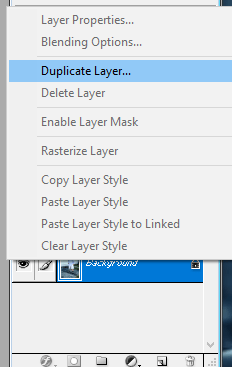
You can make the duplicate layers by double-clicking on the right button of your mouse. You can also use the shortcut keys from your keyboard to duplicate the layer, and the shortcut keys are Ctrl + J for Windows or Cmd + J for Mac.
Step-3: Create a selection
This is one of the essential steps in this whole composting process. In this step, define the person or the object from the photo that you prefer to extract and then make a proper selection around the object.
To do that, you will find plenty of cutting or selection tools on Adobe Photoshop, such as the Lasso Tool, the Quick Selection Tool, and the Pen tool. You can use any of them as you want to. As you can see in the picture, we used the Lasso Tool to create the selection. Moreover, using the Lasso tool is the most accurate way to create selections for the newbies in Photoshop to remove or cut out any object.
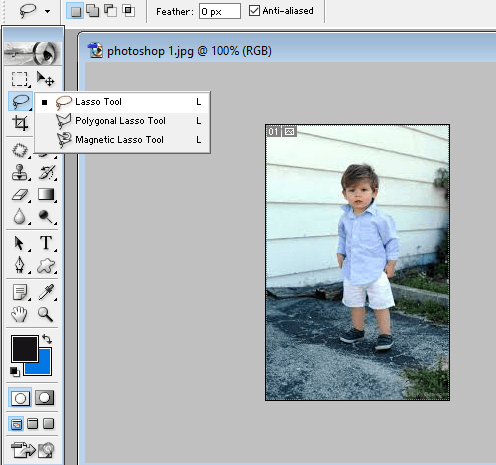
You can select the Lasso tool from the toolbar or use the shortcut L from the keyboard. After selecting the tool, start drawing a path around the object or person by clicking onto the canvas. Hold down the mouse and keep drawing until the finisher point of the path connects with the first point.
While creating this selection, we don’t need to be perfect with the job since we’ll get the chance to refine our selection in the following steps. So at this stage, you need to draw roughly around the person or object you’re willing to select.
Step-4: Copy the selection
When you are fully satisfied with your selection, you’re ready to transfer the person or object to another image where you want to add it to transfer the photo, copy or drag the mask. Go to the Edit menu and press on Copy to copy the layer.
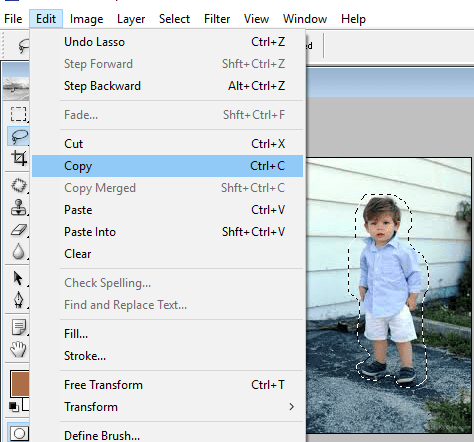
Step-5: Paste the selection
After copying the selection, paste it to the new document. Go to Edit > Paste to paste the layer.
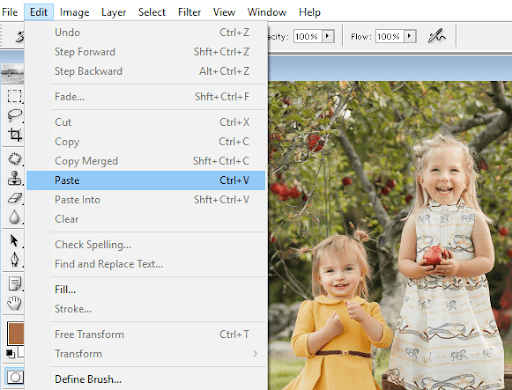
Step-6: Resize the selection
This is a very significant part of the whole process you’ve been going through. You must place the selected image into the new document in a position where it looks most natural and suitable for getting the most natural and accurate result by the end of your editing.
Use the Move tool from the toolbar to move the layer anywhere into the document. After placing the selection into a new position, ensure that the layer’s size and proportion are good enough and suit the new document where you add it.
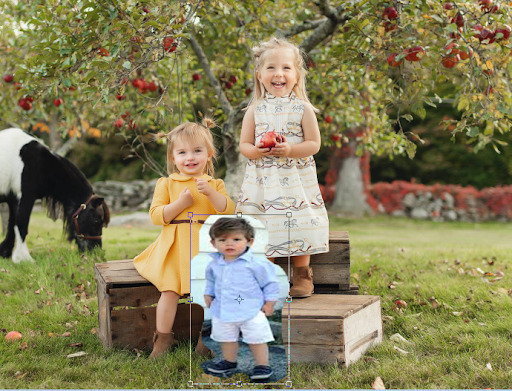
For doing this, go to the Edit menu and select the Free Transform Tool. Moreover, you can also select the tool using the shortcut keys Ctrl + T for Windows and Cmd + T for Mac. Using this Free Transform tool, you can rotate and resize the layer as much as you want.
Step-7: Refine your selection
This stage is very special, and the accuracy of your result will depend on how successfully you have done this step. In this step, we’ve to work with the selection. As we said before, you need to create the selection, ensuring that all the parts of the object or person are bound in the path you made. Moreover, no need to pay attention to the accuracy of the selection, as we can elaborate on the selection later on.
So virtuously, there may be hair or fabric inconsistencies and parts of the unwanted background that we need to remove at this stage. There are many ways in photoshop to refine your selection. But I’ll recommend that the easiest way to do that is using the History Brush tool.
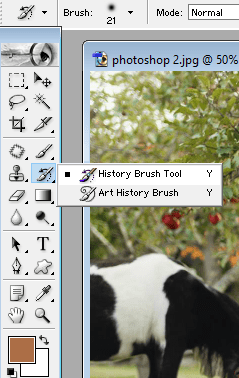
You can select this tool from the toolbar. You can change the size of the brush using the square bracket ” [] “ button from your keyboard. Here you can also add a new mask to work with the selection more accurately. Press the “\” key. A red mask will appear soon around the selection. This red mask allows you to define the unwanted parts and mark edges more clearly.
If you’ve already created the red mask and selected the brush, now you’re ready to work with the picture. Using this tool, you can remove any unwanted fragment from the picture and add any missing one. You need to work very carefully. Thus when you’re done with your job, for now, click on “\” to remove the red mask from the selection.
Step-8: Adjust lightings and shadows
If you want to get the most natural result, adjust the lighting and shadows of the original image with your selected image. In that case, professionals use their tests and tricks, though; we’ll recommend the easiest way to do this as you may not be experienced yet.
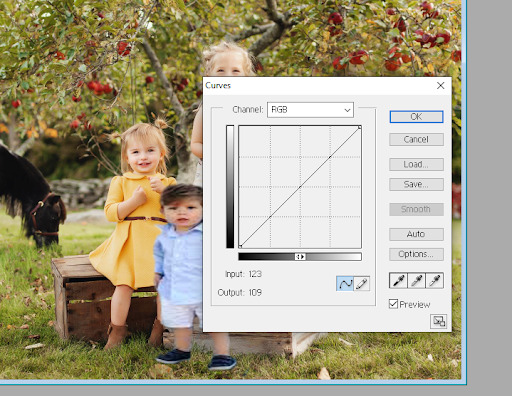
Use Curves to add lights and shadows in the new composition. But remember that, when you’re willing to add lights, place the Curves above the layer with the person, and while you want to add shadows, place the Curves layer under the mask layer.
Step-9: Get your result
We have already passed all the necessary steps we need to follow. So when you’re satisfied with your editing and feel like your composition is ready, it’s your turn to save the image to enjoy the final result.
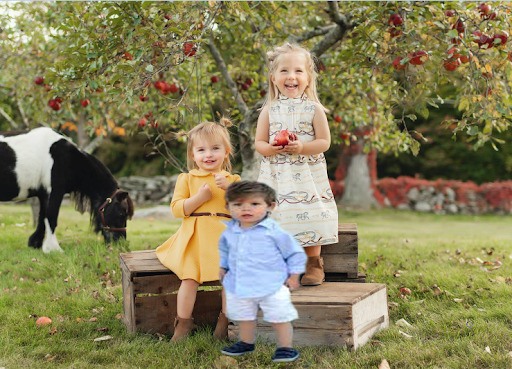
So this is where we have been run for, and it is our final result.
FAQs
▶️Can you photoshop a person into a picture?
You can photoshop a person into a picture using various photo editing tools on the internet. Adobe Photoshop is the most valuable and preferable photo editing tool used roughly to photoshop someone into a picture.
▶️How can I edit someone into a picture for free?
If you want to edit someone into a picture for free, Adobe Photoshop would be the best choice. Moreover, this tool allows you to add a person or object in a photo while removing them from a picture without any cost.
▶️How do I add a person into a photo?
We can extract a person or an object from an image and add them to another image very easily and quickly using Adobe Photoshop. To do that:
- Open up two different images on Photoshop.
- Select the person or object from the image you want to extract using the Lasso tool, Pen tool, or Quick Selection tool.
- Copy the selection and paste it into another picture.
- Resize the selected person using the Free Transform tool and refine the Brush tool selection.
And this is how I used to add a new person into a photo.
▶️What app can Photoshop someone into a picture?
If you want to Photoshop someone into a picture using your mobile phone, various mobile applications on the internet can help you photoshop a picture on your phone. You can use an app like Photoshop Mix, Adobe Photoshop Fix, Adobe Photoshop Lightroom CC, or Adobe Photoshop Express to edit a photo on your smartphone.
Final Verdict
As much as you will try this process practically, your skill will be developed gradually. Moreover, you will discover valuable tools and ways to do the same thing in more detail and perfection.
However, if you follow the easy instructions included in this tutorial, you will add any missing person or object in a photo. Photo. You can also check out this video tutorial for more information.


