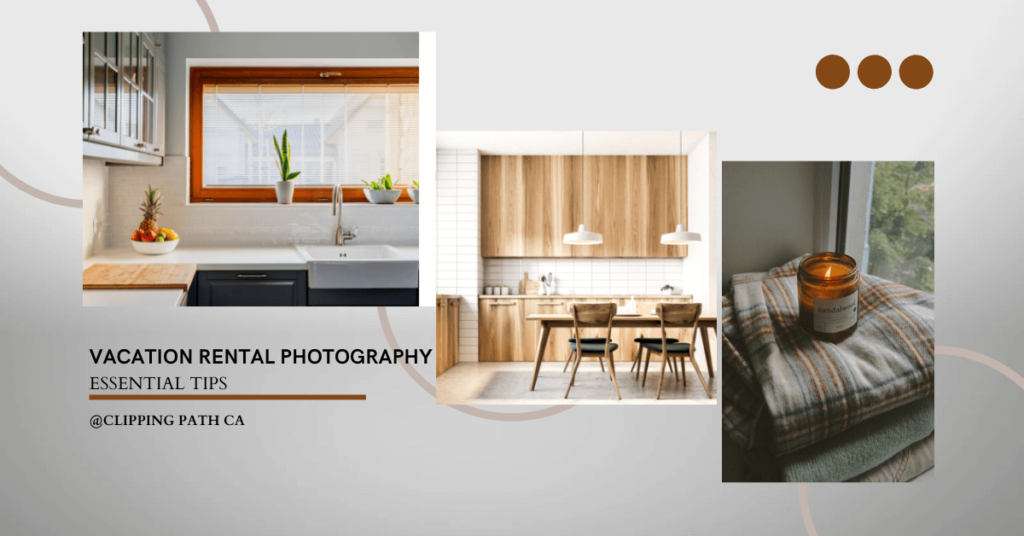
When you are in the real estate business, no one denies the importance of a first impression to the customer. In this field, first impressions decide everything— a make-or-break! And here, high-quality real estate photography holds the power to turn a simple listing into a great effect.
But how to ensure great real estate photography? Actually, professional real estate photography requires a comprehensive understanding of light, angles, and composition to highlight space, and so on.
So, ultimately, real estate photography is more than knowing your camera. That’s why, to help you out, we have brought about a comprehensive guide on every essential real estate photography tips. All you just need to do is keep on reading.
What Ensures A High-quality Real Estate Photography?
Well, we first need to understand what makes real estate photography attractive to customers. Actually, it is all about a few things, like brightness or balance, to be honest. Get to know about it below:

① Lighting
The first things that make the real estate image exceptional is the lighting. Where natural light offers warmth to the real estate photography, artificial lights lighten up the dark corners. That means you need to find a balance between natural and artificial light in real estate photography to show details clearly.
② Composition
The next thing is the composition. It means how you are going to show the property to the customer’s eye. For instance, straight lines and a stable horizon make every shot look professional. You have to ensure a balance between doors and windows.
③ Perspective
Your camera position can change the perspective of the image. For instance, if you shoot the image from too high, it will distort the image. On the other hand, if you shoot too low, it will hide depth. That is why it is best to keep your camera at chest height. It will keep lines straight and give you a real sense of scale.
④ Color Accuracy
In the real estate business, customers trust what they see in the image. So, when you are shooting real estate photography, you have to make sure the wall colors or wood tone look natural. You should avoid heavy filters. Always remember that realistic colors help build confidence in the property.
Ensure impressive real estate photography editing with Clipping Path CA
Essential Equipment Tips For Real Estate Photography

Now, let’s check out the essential equipment tips you should have for real estate photography.
Camera:
First, you ensure that to have a camera with a good range and RAW support. It will help you recover shadows and highlights during editing. Moreover, Full-frame bodies give more control in low light.
Lens:
Next, you have to use a wide-angle lens. For instance, a 16mm to 24mm focal lens on crop sensors can be suitable for interiors. It will be wide enough to show space without distortion. That’s why many real estate photography experts use with 20mm to 24mm lens to avoid unwanted proportions.
Tripod:
You should also have a stable support, like a tripod, and a remote cable release. It will help you to shoot long exposures and bracket without motion blur.
Lighting kit:
You can use a lighting kit for the dark corners. You can even use one off-camera flash with a softbox. That’s even better.
Optional:
As a real estate photographer, you can use a drone. It will help you to take the exterior and neighborhood shots.
Essential Equipment Tips for Real Estate Photography!
Following essential equipment tips will help you choose the right gear to capture stunning real estate photos according to your budget.
Lens Choice And Composition Tips For Real Estate Photography

In real estate photography, your lens choice decides how people will feel about the space. That’s why the right choice matters the most. If you want to capture a total room in one frame, you should use wide-angle lenses. However, you should not use too wide as it can distort the image.
Here is a quick lens guide for you to help you with your real estate photography.
| Room Type | Suggested Focal Length | Purpose | Framing Tip |
| Living Room or Dining | 16–20 mm | It will be wide enough to show the flow | Keep vertical lines straight |
| Kitchen | 18–24 mm | It shows the layout and surfaces | Stand in a corner. Include counters and light |
| Bedroom | 20–24 mm | Avoids distortion in tight spaces | Capture from the doorway for balance |
| Exterior and Backyard | 24–35 mm | Preserves scale | Frame the house and avoid extremely wide angles |
| Bathroom | 14–18 mm | Very tight and needs width | Keep the lens level to prevent curved walls |
| Detail / Lifestyle | 35–50 mm | Adds realism and intimacy | Use a wide aperture to isolate the subject |
Camera Settings Tips for Real Estate Photography

Now, let’s come to our most important tip section- the camera settings. Your camera settings decide the results of your real estate photography. That’s why you have to understand each camera setting so that you can adjust quickly according to the image requirements.
① Shoot in Manual Mode
Manual mode gives you full control over exposure. Auto camera settings most often brighten or darken rooms unevenly. That’s especially when you are shooting toward windows. For this reason, you should keep ISO and shutter speed balanced based on the available light.
② Aperture
If you are shooting an interior image, you should use an aperture of f/7.1 – f/11. It keeps every component in the interior sharp. You should avoid wider apertures like f/4. It can blur details. In contrast smaller aperture like f/16 may reduce sharpness in the image.
③ ISO
Yoy should keep ISO low, like anywhere between 100–400. A low ISO reduces noise and preserves detail. That is especially in shadowed corners. You can use a tripod so you can maintain a low ISO even in darker rooms.
④ Shutter Speed
You should let the shutter remain open as long as needed. On a tripod, 1/4 to 1 second is best for indoor shooting. However, you will often be around 1/100–1/250 s for bright exteriors. You can use a remote release or the self-timer of the camera to avoid shake.
⑤ Bracketing and HDR
For interiors with bright windows, you should shoot 3–5 bracketed exposures. For instance, –2 EV to +2 EV. You can blend them later to keep both highlights and shadows balanced.
| Scene Type | Aperture | Shutter | ISO | White Balance |
| Interior (Day) | f/8 | 1/2 s – 1 s | 100–200 | Daylight |
| Interior (Night / Flash) | f/8 – f/11 | 1/2 s | 200–400 | Flash |
| Exterior (Day) | f/8 | 1/100 s | 100 | Daylight |
| Twilight / Dusk | f/8 | 1–4 s | 100 | Auto / Kelvin 5500 |
| Drone / Aerial | f/5.6 | 1/120 s | 100 | Daylight |
Lighting Tips For Real Estate Photography

As we have already mentioned, lighting is the most important thing in real estate photography. Let’s check out the essential tips for lighting for real estate photography below.
Natural Light
You can ensure warmth and realism in the interior using natural light. You just have to shoot the image when the natural light is soft. For instance,
- Morning and late afternoon are best for east- and west-facing rooms.
- Overcast days work well because clouds diffuse sunlight and reduce harsh shadows.
- You should avoid direct sunlight streaming through windows. It can create blown-out highlights.
Artificial Lighting
Sometimes, you may need to use artificial lights for bathroom or hallway shots. You can use
- Speedlights or Flashes bounce off ceilings or walls to create soft and even light.
- Monolights or Continuous LED Panels: It is useful for larger spaces or video walkthroughs.
- Reflectors: They can fill shadows naturally and keep the light balanced.
Twilight Shots
You can make your real estate image look luxurious with twilight or dusk shots. Here is what you should keep in mind for twilight shots.
- Use a tripod and long exposure for 1–4 seconds
- Adjust the ISO to 100–200 to avoid noise
- Bracket exposures if the windows are very bright
Video, Virtual Tours, 3D, and Floor Plans

The following are some essential tips on virtual and video tours for real estate photography:
① Real-Estate Video Walkthroughs
Check out the following professional tips for a real estate video walkthrough.
- You can use DSLRs or mirrorless cameras.
- You should match the lighting mood in rooms.
- You should move slowly, pan or glide through doorways. Avoid sudden tilts or zooms.
- You can add gentle background music and lower-third text with property details.
You can follow the recommended sequence below for video walkthroughs.
Exterior → Entryway → Living → Kitchen → Bedrooms → Bathrooms → Backyard → Aerial outro shot.
② Drone and Aerial Footage
With respect to capturing professional results, a seasoned Videographer Sydney is guaranteed to nail the height. For expert drone videography, you get consistent cinematic aerial footage for residential and commercial projects. Follow the best practices below to take images using a drone.
- You should keep the drone between 20 – 60 ft or 6 – 18 m high.
- You should try to shoot in the early morning or dusk. It will help to reduce shadows.
- You should take orbit shots around the house for full coverage.
Here are some drone suggestions to help you out:
| Drone Type | Use Case | Notes |
| DJI Mini 3 Pro | Compact, good for residential listings | Quiet and stable |
| DJI Air 3 / Mavic 3 | Professional quality, extended flight time | Ideal for commercial properties |
| Autel Evo Lite+ | Excellent low-light performance | Great for twilight shots |
③ Floor Plans: The Unsung Hero
Floor plans help buyers understand the layout and room flow immediately. You can use these tools to create floor plans.
- Cubicasa: Quick, app-based scanning.
- RoomSketcher or MagicPlan: It creates editable layouts with dimensions.
- Matterport add-on: It automatically generates floor plans from 3D data.
④ Packaging Multimedia Services
Here we have gathered some multimedia service packages that show how to turn your real estate photography skills into marketable offerings.
| Package | Inclusions | Ideal for | Suggested Price Range |
| Basic | 25 HDR photos + simple walkthrough video | Standard residential listings | $250 – $350 |
| Premium | HDR photos + video + drone shots | Luxury or larger homes | $450 – $700 |
| Platinum | Photos + Drone + 3D Tour + Floor Plan + Twilight shots | High-end, commercial, or developer clients | $800 – $1500 + |
Pricing, Packages & Deliverables
Pricing is also very important in real estate photography. It will help you to ensure that to get the best price for offering the best real estate photography. Here are some tips for real estate photography pricing for your assistance.
① Factors That Affect Pricing
| Factor | Description | How It Affects Price |
| Property Size | Larger homes need more rooms, angles, and time | Bigger properties → higher rates |
| Deliverables | Still photos, videos, drone, 3D tours, etc. | More deliverables = more editing time |
| Location | Urban vs. rural access, travel distance, and parking | Long travel → add travel fee |
| Turnaround Time | Express 24-hour delivery or standard 48-hour delivery | Rush jobs cost 20–40 % more |
| Licensing / Usage | Personal or commercial advertising use | Commercial licenses are priced higher |
② Common Pricing Models
| Model | Description | When to Use |
| Per-Property / Flat Rate | One fixed rate per listing, based on size. For instance, up to 2000 sq ft = $250. | Best for small- to medium-sized residential listings |
| Per-Image | Charge per final photo. For example, $10–$20 each | Great for designers or agents needing selective shots |
| Hourly Rate | Bill for time spent shooting and editing | Works for unpredictable or custom projects. |
| Package-Based | Bundled deliverables at tiered prices | Ideal for building recurring clients |
③ Sample Package Structure
| Package Name | Deliverables | Ideal Client | Typical Range |
| Starter | 20–25 HDR-edited photos, basic color correction, 48-hr delivery | Small homes or rental listings | $200 – $300 |
| Standard | 30–40 photos, drone exteriors, 60-sec walkthrough video | Mid-range residential agents | $350 – $500 |
| Premium | 40–60 photos, drone + twilight shots, 2–3 min video | Luxury listings or larger properties | $600 – $900 |
| Elite / Commercial | All Premium + 3D tour, floor plan, virtual staging | Developers, commercial spaces | $1,000 – $1,800 + |
④ Add-On Services
| Add-On | Description | Typical Fee |
| Twilight Exterior Shoot | Evening session capturing warm interior glow | +$150 – $250 |
| Virtual Staging | Adding furniture digitally to empty rooms | +$25 – $50 per image |
| Drone / Aerial Package | 5–10 drone photos or 30-sec aerial clip | +$150 – $300 |
| 3D Virtual Tour (Matterport) | Interactive, immersive walkthrough | +$200 – $400 |
| Floor Plan Creation | 2D or 3D layout plan | +$100 – $200 |
| Next-Day Delivery | 24-hr turnaround | +20–30 % of the total price |
Marketing and Client Relationship Strategies for Photographers
Well, as you know, taking impressive photos is only half the job. The other half is getting your work noticed. Check out some tips to get noticed.
① Build a Professional Brand Presence
Your brand should instantly communicate trust and professionalism. That is why you should create an image-first website showcasing your best work. You can include a portfolio by property type. Moreover, you should always communicate with your clients from a branded email. Ensure to have social proof.
② Optimize for Local SEO
Most of your clients search locally. That’s why you should optimize for location-based SEO.
- Use keywords like “real estate photographer in [City]” throughout your website and Google Business profile.
- Add geotags and location data to your photos before uploading.
- Encourage satisfied clients to leave Google Reviews.
- Post regularly on Google Business.
③ Use Social Media Strategically
You can also use social media for marketing.
| Platform | Best Use | Tips |
| Share before/after shots, reels of property walkthroughs | Use local hashtags (#LARealEstatePhotography, #MiamiHomes) | |
| YouTube | Publish short video tours or tutorials | Optimize titles with location keywords |
| Network with realtors, developers, and interior designers | Post case studies or collaborations | |
| Great for long-term visual discovery | Pin your best room compositions & twilight shots |
④ Network and Build Realtor Partnerships
Always keep in mind that real estate agents and brokerages are your repeat customers. That’s why you should work to build trust and a partnership. You can offer discounts or mini “trial” packages to your first-time client. You should attend local real estate events or photography expos.
⑤ Retention
Client retention is always the best way to make a big impact. You should follow up after delivery to ask for feedback. You can send reminders before seasonal campaigns and create loyalty discounts for repeat agents or multi-property clients.
Common Mistakes to Avoid in Real Estate Photography
| Common Mistake | Quick Expert Tip |
| Poor composition and framing | Shoot from chest height Use corners and a tripod level |
| Over or underexposed interiors | Shoot RAW; bracket exposures; balance light |
| Cluttered or poor staging | DeclutterSubtle staging for appeal |
| Extreme wide-angle lenses | Stick to 16–24 mm Avoid distortion |
| Inconsistent editing | Use a consistent workflow and presets |
| Ignoring multimedia | Add video, drone, 3D tours, or floor plans |
| Poor client communication | Be transparent and deliver on time |
| Not scouting property | Walkthrough to plan shots and lighting |
| Too few images | Capture extra angles for flexibility |
| Not staying updated | Learn new techniques and trends regularly |
Conclusion
Well, as you see, real estate photography is more than capturing spaces. In fact, it is all about telling a story to the customer that ensures sales of the property. You have to get an idea and master everything that is required for real estate photography to ensure high-quality results.
Moreover, you should combine your technical skills with smart marketing to stand out in this competitive market. Take your time and turn your real estate photography into compelling visuals that sell properties and bring you credibility.
Turn Your Real Estate Shots into Eye-Catching Listings