In recent times, when perfect images are just a luxury, a clipping path service is becoming necessary to ensure an attractive image. Clipping paths highlight details and transform your ordinary images into magazine-level photos.
But here comes the real challenge. Whether you should tackle this necessity with DIY clipping path vs professional services for precision, right? Which one will be best for you? Let’s help you out in today’s guide. Read on.
What Is A Clipping Path?
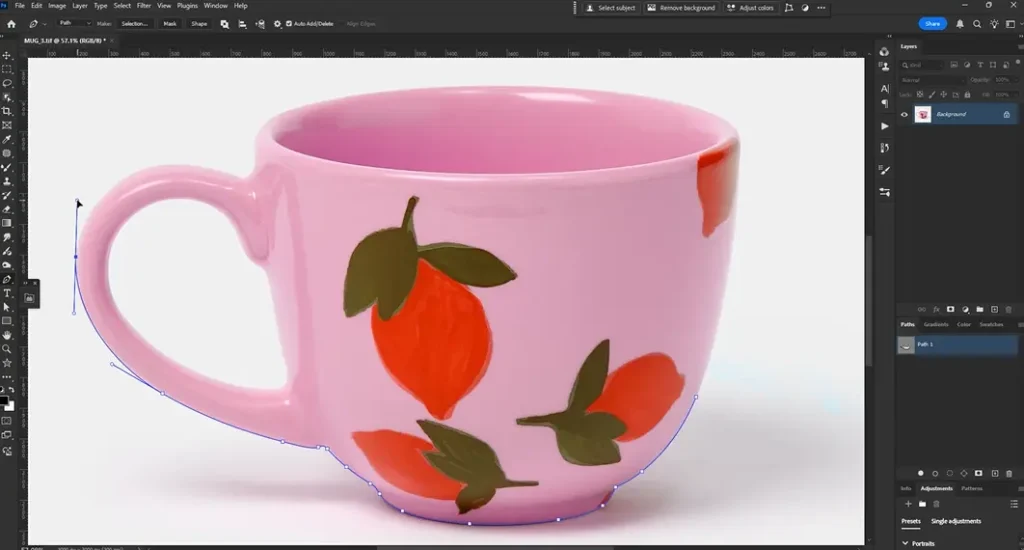
A clipping path is a closed vector drawn around an object in an image. It is done to separate that object from everything outside the path. You can say it works just like a pair of scissors, but the digital one.
You can create clipping paths using the Pen tool in programs such as Adobe Photoshop or Illustrator. Moreover, as the path is a vector, it scales cleanly. You can ensure the image gets a crisp edge defined by the path. Clipping paths are ideal for objects with well-defined outlines. Such as product photos and packaged items.
DIY Clipping Path
How it’s typically done
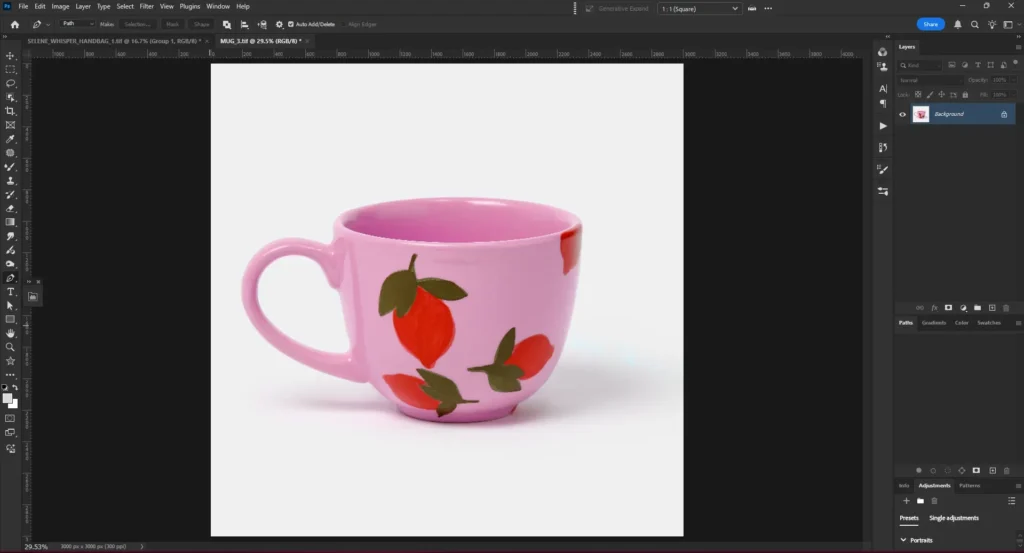
You can create a clipping path manually in Photoshop. Here’s a step-by-step guide to help you understand how it is typically done.
Step 1: Launch Adobe Photoshop.
Step 2: Navigate to File > Open and select the image you wish to edit.

Step 3: Select the Pen Tool and set the tool mode to Path in the options bar at the top.
Step 4: Create anchor points around the subject
- For straight lines, click at each corner.
- For curves, click and drag to adjust the direction handles and the curve.

Step 5: Now complete the path. Now, hover over the first anchor point until a small circle appears next to the Pen Tool cursor.
Step 6: Click the menu icon in the Paths panel and choose Make Selection. Adjust the feather radius if necessary and click OK.

Step 7: That’s all! At last, save the Image
DIY Clipping Path: Pros and Cons Table
| Pros of DIY Clipping Path | Cons of DIY Clipping Path |
| ✅Low upfront cost ✅ Complete creative control over edits ✅ Improves your photo editing and design skills ✅ Instant access to edit images ✅ Works well for a few images at a time ✅ You can ensure the style fits your exact preference. ✅ You can make adjustments anytime | ❌ Software may be required ❌ Hard to maintain consistency in multiple images ❌ Steep learning curveIt can be very time-consuming, especially for complex images ❌ Not scalable for hundreds or thousands of images ❌ Achieving professional-level quality on complex subjects is difficult for beginners |
The Professional Clipping Path Service
How it’s typically done
Professional clipping path services offer a high-quality approach to isolating objects from backgrounds.
Here’s an overview of how it is typically done.
Step 1. Image submission
First of all, you need to upload your images to the platform of your chosen service provider. You can so so through
- Web Upload
- Cloud Storage like Google Drive or Dropbox.
- Email.
Step 2. Initial assessment
After the service providers receive your images, they checks the image quality and assesses the complexity. Next they provide a Quote offer pricing based on the assessment.
Step 3. Create the clipping path
Once you approve, the editing begins. Professional editors use advanced tools and techniques to create the clipping path. For instance,
- Pen Tool in Photoshop for creating precise vector paths around subjects.
- Carefully trace around the subject manually to ensure accuracy.
- Make adjustments to Anchor Points for fine-tuning curves and angles for complex shapes.
Step 4. Quality control
Now the service ensures high standards in every image. They usually do multiple reviews of each image at different stages of editing. Here, you can request revisions if necessary. Only after you are 100% satisfied with the results, images are finalized.
Step 5. Delivery
At last you will receive the edited images in your desired formats. For instance, PNG, PSD, or TIFF. You can get images through download links by email. Moreover, depending on the complexity and volume, delivery times can range from a few hours to several days.
Pros And Cons Of Professional Clipping Path Service
| Pros of Professional Clipping Path Service | Cons of Professional Clipping Path Service |
| ✅ Expertise and precision ✅ Time efficiency ✅ Professional services can handle large volumes of images ✅ Maintains uniformity across images ✅ Reduces the need for in-house editing teams | ❌ Higher per-image cost, although bulk discounts are available ❌ Potential communication delays ❌ Not all service providers maintain consistent quality ❌ Limited creative control |
Difference Between DIY Clipping Path vs Professional Service
| Aspect | DIY Clipping Path | Professional Service |
| Cost | Low to moderate | Moderate to high |
| Skill Needed | High | Low for you — experts handle the technical work |
| Time Investment | High | Low |
| Quality or Precision | Variable — good for simple shapes | High |
| Scalability or Volume | Poor | Excellent |
| Turnaround Time | Immediate | Fixed or fast turnaround |
| Equipment and Tools | You need software (Photoshop, pen tool, etc.), and hardware | Service already has all the tools, infrastructure, and an expert team |
| Control and Flexibility | You control every detail. You can make instant edits | You rely on communication and revisions with the provider |
| Best Use Cases | Small jobs, personal use, learning, occasional edits | E-commerce catalogs, large batches, professional branding, and tight deadlines |
| Risk of Errors | Higher | Lower |
Cost Considerations: DIY vs Professional
Cost is one of the biggest factors in deciding whether to do clipping paths yourself or hire a professional.
In simple words, DIY clipping paths require low upfront spending. But they take a lot of your time. In contrast, professional services cost more per image. However, they save you time and deliver high-quality results.
Price ranges by complexity
The cost per image depends mainly on how complex the subject is. Simple products like boxes or phones cost less. But hair and transparent items are much more expensive.
| Complexity | Typical Per-Image Cost |
| Simple (boxes, phones, basic products) | $0.25 – $0.50 |
| Medium (shoes, furniture, plants) | $0.50 – $1.50 |
| Complex (hair, jewelry, glass, reflective items) | $1.50 – $3.50+ |
[Note: Prices vary by provider location and turnaround time. It is seen that western agencies often charge more but include account management and secure processes.]
Time cost, aka your labor
That’s true with DIY clipping path, you don’t have to pay per image. However, your time has value and it also count, right?
- A simple clipping path usually takes 5–10 minutes if you’re skilled.
- Complex edits like hair or jewelry can take 30+ minutes per image.
DIY and professional clipping path: time vs cost
| Type of Image | DIY (time cost) | Professional (typical per-image) |
| Simple product | 5–15 min per image | $0.25 – $0.50 |
| Moderate | 15–45 min per image | $0.50 – $1.50 |
| Complex | 30–120+ min per image | $1.50 – $3.50+ |
| Enterprise workflow | N/A (tooling + team) | Custom pricing. It is often a subscription or negotiated rate |
Volume & discounts
Volume and discounts also matters in cost considerations. Most professional providers reduce rates for bulk orders. However, you can expect the discount for clipping path service as mentioned below.
- 1 to 50 images: Standard base pricing.
- 51 to 500 images: A 10–15% discount is common.
- 500 to 1,000 images: 20–25% discount or custom pricing.
- 1,000+ images: Enterprise contracts or monthly flat rates.

Rush fees and SLAs
If you need a faster turnaround, you expect to pay a rush fee. For instance,
- Standard turnaround: 24–72 hours (normal price).
- Rush delivery: 6–12 hours, often 25–50% extra.
- Overnight bulk jobs: Custom, premium rates.
When to Choose DIY vs Professional?
1. Volume & scale
If you need a few image edit you can do it yourself. In contrast, if you process hundreds or thousands then it will be wise to outsource.
2. Quality & complexity
For simple shapes and clean edges like boxes, flat products, DIY can give you good results. However, for hair, fur, glass, water, or translucent objects, hand-drawn paths matter.Som you should let the pros handle it.
3. Budget & cost per image
DIY costs you software, and your labor. So, you should count your hourly rate when you compare. Also consider that services charge per image and give volume discounts when calculating the prices.
4. Turnaround & deadlines
It’s true that DIY gives instant control. But each image takes time. You can expect your images edited at a fixed turnaround. So, If you have tight schedules, you can let the pros handle it.
5. Tools & skill level
If you already know Photoshop’s Pen tool and masking, DIY can save you money. But if you are beginner, you will have to spend hours learning. Moreover there will chances for mistakes. In this case you should hire professional services.
Conclusion
All in all, choosing between DIY and professional clipping path services depends on your budgetand quality needs. To summerize the whole discussion, DIY works for small projects and simple edits. It gives you control at low cost. Professionals save time and ensure high-quality results for complex or bulk work. For most businesses, a hybrid approach offers the best of both worlds.
Also of interest:
- What is Clipping Path in Photoshop? A Beginner’s Guide (2025)
- Clipping Path vs Background Removal – What’s the Difference?
- Types of Clipping Path (Simple, Medium, Complex, Super Complex)
- 10 Best Clipping Path Services In London [Experts Choice]
- How To Choose Clipping Path Service Provider For E-commerce Business
- Benefits Of Clipping Path Outsource: Get Your Images Edited Easily!
- Best Clipping Path Service Providers of 2025: How to Choose the Best One
- Clipping Path vs Image Masking – Which is Right for You?
- Clipping Path for E-commerce: Boost Sales with Perfect Images
- Top 10 Industries That Need Clipping Path Services (E-commerce, Jewelry, Fashion, Furniture, etc.)
- Outsource Clipping Path Service – Benefits, Pricing & Tips
- Clipping Path Price Guide – How Much Should You Pay in 2025?


