If we start talking about E-commerce and online stores, there’s no way we can ignore fashion and apparel. So, for obvious reason, clothing photography is one of the most demanding sectors of professional photography.
There’s no doubt that clothing photography can be a promising career. But the actual problem arises when you are asked to click professional photos of the clothes. Now, you may think that all I need to do is click on the camera’s shutter. What’s so difficult about it? Well, indeed, it is easy to click photos. But making them look fabulous enough to bring customers, that’s difficult.
This is why we have tried to put everything you need to know about clothing photography. Also, we have added some tips and tricks that will help you to pursue your photography career. Aren’t you excited? Let’s get started then!
What is Clothing Photography?
Let’s start with some basics first. Do you know what professional clothing photography is? Do you have any idea what you will be dealing with in this job?
Clothing photography, also known as Fashion photography, is a genre of photography. It refers to clicking stunning photos of clothes/garments in their best possible condition and presents them to the customers. The ultimate motive behind this type of photography is to promote a brand or selling the garments online.
Why is Professional Clothing Photography Necessary?
Photos are the soul of online business and the digital marketplace. It’s not possible to judge the product in real in the online market. Consumers solemnly depend on the product photo provided by the sellers to decide if they will buy it. If your product looks good in the picture, 70% of the work is done. It will attract customers and bring profit to you in no time.
If the product you are selling happens to be a clothing item, you need to pay extra attention. You need to show the best view of your cloth to the customers. The photo should also be stunning enough to grab the buyer’s attention and make him spend money on the item.
As a photographer, you have to keep in mind that you have only one chance and one photo to impress the customer. Your provided images either will catch his eye, or he will just ignore them. So, the pressure is high. That’s the reason why professional clothing photography is no necessary. The fate of the online clothing business depends on it.
How to Photograph Clothing Items for Online Business?

“How to take pictures of clothes to sell?” That’s the first question that pops up in the mind of a beginner photographer. Yes, as an apparel photographer, your main concern should be bringing in as many buyers as possible.
We have described how to photograph clothes from scratch for your better understanding. If you are a beginner, the steps will surely help you a lot. And if you are already a professional, you can take a look and find out if you are making any mistakes during the photoshoot.
Step-1: Plan the Photoshoot
The first thing to do in photography is planning. Do some thinking and decide how you want to display and photograph the product.
What kind of product will you be working with, what’s the purpose behind the photoshoot, how customers like to see that product? You have to figure out everything. You need to have a clear concept of how you are going to position the garments. Are you hiring a model, or will you be working with a dummy?
There’s a lot to plan and prepare before the photoshoot. If you think that you can plan all of these on the spot during the shoot, let me tell you that will be total chaos. So, take some time, think a little, and preplan the photo session.
Step-2: Prepare the Garment
If you ask me what’s the most crucial part of the clothing photoshoot, I will say preparing the garment. It’s a thing that you must do. You will often receive old, worn out, dirty fabrics with lots of creases. Obviously, that’s not the ideal condition to work with. So, you need to prepare the clothes before shooting.
But often, you will see photographers ignoring this step. They think they can fix the creases, folds, spots, and other defects using Photoshop. Photoshop is indeed a blessing, but it’s not magical. If it could do everything, there wouldn’t be any need for professional photographers.
It’s better to depend on Photoshop for correcting unwanted and minor mistakes. So, you should prepare the garments beforehand so that the post-production becomes easy. Here are some tips on how you can do the preparation.
1. Washing or Dry Cleaning
As I said earlier, sometimes you may receive garments full of dust and dirt. Or even worse, with ugly stain marks. In order to remove all these, it’s better to wash or dry clean the clothing product. But be careful with the washing. Don’t be so hard on them to be torn apart.
2. Iron or Steam the Clothes
You definitely don’t to show a wrinkled cloth to the customers. A simple crease or fold can easily ruin the photo. And it is enough to destroy your online business. So, iron or steam the clothes beforehand to present a plain and neat garment to the buyers.
3. Use Lint Roller
If you don’t have enough time to wash out the small amount of dust and dirt, try using a lint roller. It can also help you in getting rid of loose strands, extra furs, and lint. Just roll the lint roller over the fabric a few times after ironing. It will surely save your picture by getting rid of dust spots that get exposed to the lighting.
4. Use a Stiff Brush
A stiff brush is generally used for removing wet dirt like mud, sweat which has dried up and left a stain. This tool is handy for brushing off blemishes along with dirt and dust. It can also help to flatten out the clothing material and ready it for the shoot.
5. Check the Details
Be sure to check if the clothing item is missing any button, hook, zipper, or stones. If yes, then repair them. Also, remove the price tags and other stickers or labels from the clothes. These are minor details and can bring a significant change in your photo.
Step-3: Prepare the Equipment

Without proper equipment, you can’t click good photos. It’s as simple as that. But that doesn’t you have to buy every single piece of equipment you see in the shop. That’s not necessary. Also, it costs a fortune. You just need some essential equipment like a camera, tripod, light, backdrop kit, etc., for your business.
Let’s take a look at the list of the necessary equipment you need for clothing photography.
1. Camera
Having a professional camera is the first necessity if you are a photographer. So far, DSLRs are the best option for this. Of course, they vary depending on functions and cost. But almost all DSLRs are capable of taking a premium quality picture in the first place. So, just go for one that suits your budget.
2. Tripod
Tripods are 3/4 stands supporting stands that holds the camera in place. It helps to prevent unwanted shake of the camera during clicking pictures. You may think your hand is stable enough, but let me tell you, it’s not! A mere, unnoticeable shake can be the cause of blurry, unclear photos. And that is enough to drive away buyers. So, having a stable tripod is a must.
3. Lens
Using the correct lens is another necessary thing that is often overlooked. Most of the photographers just go with their regular lenses for clothing photography. If they have focal lengths of more than 50mm, then they work awesomely. But if it’s not, the result is not so good. There may be some fluke good shots, but you can’t really just depend on them.
Choose a lens with a focal length of 50mm or more than that. It will help your clothes to look at their natural size without any zooming.
4. Lighting Kit
Selecting the source of light is another important thing in photography. You need proper lighting to illuminate the garment properly, along with the designs and other elements. Natural light can be a good source, but you will need to depend on a lighting kit in indoor photography. Spend a little money and get at least a three-in-one (back, key, and fill light) lighting kit.
5. Backdrop Kit
The backdrop is used for creating a specific visual behind the subject of the photo. You can also call it a solid background. For clothing photography, solid white or green is mostly favorable. Generally, the backdrop comes with a stand. But remember to check out the height of the stands keeping in mind that you will need to shoot with mannequins and models. So the height should be more than 7ft at least.
6. Mannequin or Model
Clothes look best when they are worn. In that way, buyers can also understand the fittings and measurements of a dress more accurately. That’s the reason why clothing photography requires models. But models can be pretty costly. In that case, dummy and mannequin can serve as a great alternative. Try to shoot with that.
Step-4: Set Up the Studio
A high-tech professional studio or a normal one, it doesn’t matter where you are shooting. What matters is you are setting up the studio with the proper equipment. Setting up the studio for a photoshoot sounds relatively easy, but it’s not the case in reality.
The way you position your camera, lights, the backdrop will impact your clicked photos. That’s why it’s necessary to set up everything in order before the shoot.
Firstly set the backdrop behind the model or mannequin. Now, place the camera right in front of the subject. If you are using a three in one lighting kit, place one light right beside the camera, which will act as a central key light. For the second light, set it at a 45° angle on the dummy’s side, further from the first key light. Now, put the third light on the other side, between the mannequin and the backdrop.
There, you have set up two essential pieces of equipment. Now just arrange other things in order, and you are ready to click some good shots.
Step-5: Check the Camera Settings
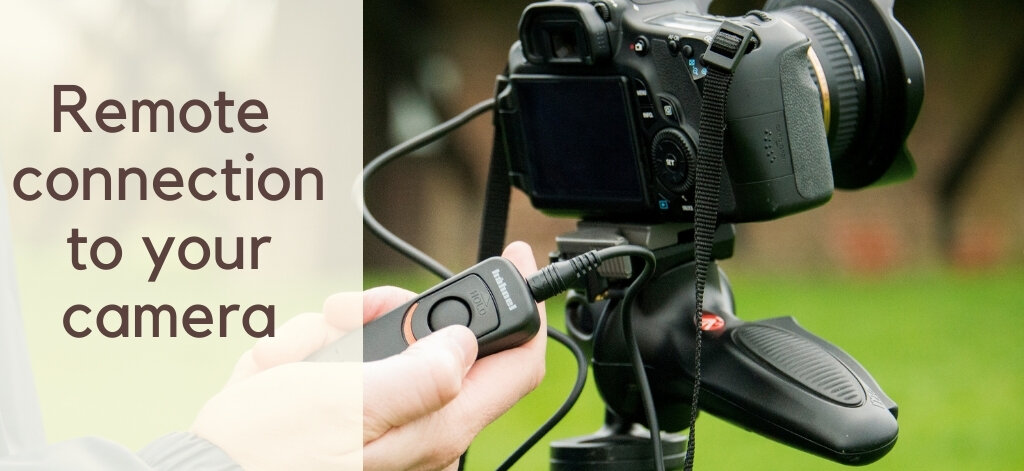
Often photographers pay so much attention to other camera accessories that they forget about the camera settings. But also, some clever ones like to play with the camera for better shots. And I would recommend the same.
A good DSLR comes with lots of features. They are capable of shooting premium quality photos, only if you set them correctly. In clothing photography, you need to handle a couple of camera settings appropriately; the ISO, Aperture, White Balance, Shutter Speed, etc. Let’s take a quick look at them.
1. Aperture
Aperture controls the amount of light that will enter the camera. The letter f expresses it. The higher the aperture is, the more light can pass through it. A higher aperture allows the camera to focus on a larger area. And that’s what we need to photograph clothing items.
Set the aperture of the camera between f/8 to f/11. In that way, you can cover the whole garment, and all areas will be equally focused.
2. ISO
ISO sensitivity decides how bright your image will be. In a higher ISO, the image will seem more bright. But it can be disastrous for clothing photography. High ISO creates noises in the picture, which is not so acceptable. In higher ISO, the sharpness of the image also reduces a lot. And as a result, the edges and lines become softer, and the details on the clothes are not adequately seen.
That’s why the best ISO for clothing photography is 100 to 200. Even if you try to go a bit higher, it should not be more than 600.
3. White Balance
Sometimes, when you take photos, it may seem like it was taken using a blue or yellow filter. Well, probably it’s the white balance of your camera that was imbalanced. A minor mistake, right? But it can change the photo drastically.
The white balance of a camera depends on the source of light you are using. This feature measures the light color and decides the best color balance for the photo. You can either set it on auto mode letting the camera do all the thinking. Or you can just set it according to your preference and light source.
4. Shutter Speed
Shutter speed measures the time of how long your camera will be exposed to the light. The slower the shutter speed, the blurry the image is. Stutter speed less than 1/60 is difficult to work with, and it ends up making the pictures hazy and blurry.
For clothing photography, the ideal shutter speed is around 1/125. This high shutter speed will help you to get a clear and sharper photo.
Step-6: Display the Clothes
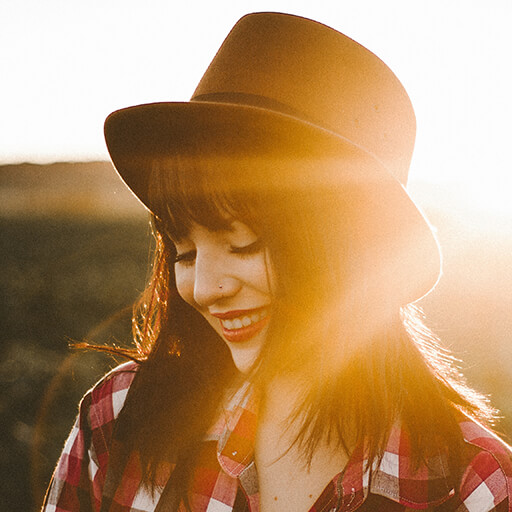
Attractively displaying the clothes/ garments is a vital thing before photographing clothing items. A neat, full-length display if fabrics attract the customer. So, keeping that in mind, you have to decide how you will display your products to them.
There are a couple of ways of displaying clothes. Working with a model, mannequin, dummy, or flat lay photography are some of the trendy and ideal ways. Let’s check them out.
1. Hire a Model
Hiring a model who will wear the clothes and uniquely show them is the best way of displaying clothes. When a model wears a garment, it’s actual size and the fitting becomes more prominent to the consumers. They can understand if that cloth will fit into them and if it will look good on them.
But hiring a professional model is quite costly. In that case, you can ask one of your friends to become your model. You can just cut out the faces if they want to keep them private. All you need is to show is clothes anyway. That’s quite a money-saving idea.
2. Use a Dummy or Mannequin
In case you can find neither a model nor a friend, and then what will you do? Well, you still have a great alternative in hand. Yes, I’m talking about mannequins. They are given the body shape of humans. So it’s relatively easy to replace humans with these dummies.
Nowadays, there’s also a trend called ghost mannequin. Though it’s created by removing the actual figure from the photo using Photoshop, it’s quite popular. Ghost or real mannequins are an excellent option for photographing clothes.
3. Flat Lay Photography of Clothes
This is one of the most common and cost-saving ways of displaying clothes. All you need to do is, lay down the garments flatly on the floor and click photos. But you need to be careful with creases and wrinkles. Clothes tend to get folded easily on the floor.
I won’t recommend flat lay photography. It doesn’t give the customers a chance to visualize the product, which can be a reason for losing potential buyers. But if you can pull off everything correctly, it can also attract customers. In this type of photography, everything depends on the photographer.
4. 360 Degree View
360-degree photography has become quite popular in recent years. Now clients like to look at the product from all angles and then decide if they will buy it or not. The same goes for clothes.
360-degree clothing photography projects all sides and dimensions of cloth from all angles. The 3D image of a model wearing the dress gives the customers a real-life vibe. As if the model himself is present the product to them. It also helps them to understand the size, fitting, design more accurately. And indeed it helps in increasing the sell up to a great extent.
Step-7: Start Clicking Photos
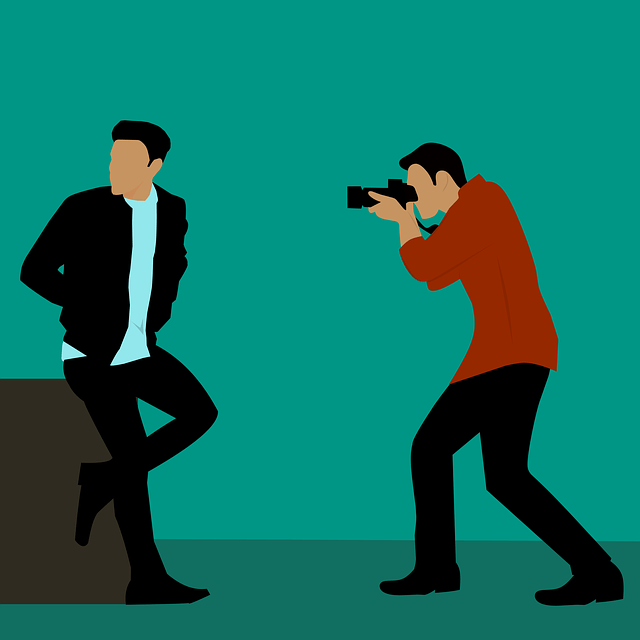
Now that you have arranged everything correctly, it’s time to snap some shots. Place your camera right in front of the object. Now check if the focus, ISO, and other settings are right or not. Click some test shots to check if anything needs to be changed.
Check the lighting properly because if it’s not in place, your photo will ruin for sure. Take as many shots as possible. Change sides angles to make the images look different and more attractive.
Here are some suggestions on how you should click photos to attract more customers.
1. Choose the Right Background
Selecting background impacts a photo to a great extent. That’s why it needs to be the right one. Generally, white is the most common and classical choice for background when you photograph clothing items.
The white background doesn’t take away the attention from the clothes. Also, it helps to portray the colors accurately. The colors look vibrant and eye-catchy in a white or transparent background.
2. Click Multiple Shots
One picture can never satisfy the customers. They like to see multiple photos of a product from different sides and angles and then make the decision if it’s worth buying or not. That’s why you need to take multiple different shots of cloth to post them online.
Also, there’s no guarantee that your first shot will be the best one. Click a couple of more pictures in the same pose. In that way, you can choose the best one among them later and present them to the buyers.
3. Show off the Details
You should definitely take some close up shots showing the dress’s details, for example- the designs, embroidery, stone works, buttons, zippers, etc. You should display these important details to the customer to have a better idea about the product.
A close shot of the fabrics will help the buyers observe what kind of fabric is that. And they won’t feel disappointed after getting the parcel. Showing off these details will also help you get rid of the customers’ questions regarding the materials, design, etc.
Step-8: Edit the Photos

The most crucial part after clicking photos is editing them. Lots of mistakes might occur during the photoshoot. If you decide to correct all of them on the spot, you probably won’t be able to finish the shoot anytime soon. That’s why you should handle the basic stuff and leave the minor ones to Photoshop.
Photoshop is meant to correct unwatched mistakes. That can be color correction, background changing, cropping, fixing the exposure, or anything else. But along with these, Photoshop can make a simple photo into a stunning one by making some changes. But that requires expert editors. You should hire an expert photo editing service provider if you are unable to do the editing yourself.
Let’s take a look at how you can take care of the post-production editing.
1. Cropping
Crop the unnecessary and attention-diverting parts. But remember, crop to the extend that is necessary. If the photo doesn’t need any cropping, just let it be in its original form.
If you plan to post multiple photos of the same cloth, you must crop all of them in the same size. The mismatched size will make the clothes appear in different sizes. You should be careful with that.
2. Color Correction
Due to improper white balance, the colors, hue, and saturation can get imbalanced. Especially colors like neon, pink, red confuses the camera. Hence, it’s hard to get the exact color in the photo. This is the reason why you should correct the colors in the pictures before posting them online.
Also, don’t forget to convert the edited images using the correct color space. SRGB is the best choice as a color space. It ensures the constant consistent and vibrant color in all devices, browsers, and websites.
3. Background Changing or Removal
In case the background doesn’t match with the clothes or diverts attention from the actual product, it’s better to change it. Now you can do two things. Either you can change the background by replacing it with a different one. Or you can remove the background.
Both ways are quite popular and increase the quality of the photo for the better.
4. Alignment
If you are using multiple photos, you should align them in the same size. Else, the buyers will get confused about the actual size. It’s better if the clothes are centered in the image. Also, you need to make sure that all sides, angles, and edges are aligned with one another.
5. Ghost Mannequin Effect
It is one of the trendy and popular ways of showcasing clothes. To create this effect, you just need a dummy or mannequin. Photoshoot with the real dummy and remove that afterward using Photoshop. It will make the clothes seem like floating in the air, which can be considered as the ghost effect.
Often clothes look good on models, so customers face problems choosing what will look good on them. But if you use a ghost mannequin, they can understand the measurements and fittings even though there is no model. In that way, they can easily look into the product and make a decision.
6. Smooth out the Wrinkles
The first phase of clothing photography is preparing the garment so that there are no wrinkles or creases. But even though there can be a small fold present in the photo, you haven’t probably noticed earlier. So what to do? Redo the whole photoshoot again?
No. Just smooth those folds, creases using Photoshop.
Tips and Tricks for Pro Level Clothing Photography
No matter how many rules and steps you follow, ultimately, some small tips and tricks can be a lifesaver at times. These simple yet useful tricks can turn a simple photo into something extraordinary. Want to know some of them? Let’s check them out.
- Use iron or steamer to plain out the clothes before shooting.
- If the clothing item has buttons, zippers, and hooks, keep them closed.
- Remove any kind of labels and stickers before taking pictures of the clothes.
- Hire a model or use a mannequin to do the photoshoot. You can ask one of your friends to become your model if you want to save costing.
- Make sure that the clothes fit on the mannequin. If they are too big, use clips to make them fit on the dummy.
- Use masking tape for those parts slipping from the mannequin, such as the sleeve and neckline.
- Never use the digital zoom when you are doing clothing photography.
- Use a tripod for a stable shot.
- Shoot beside a window if you want to shoot in natural light. Else purchase a lighting kit for enough light supply.
- Use a backdrop kit with a stand for a solid background. Or you can make a DIY backdrop by using white paper.
- For clothing photography, lenses with a focal length of more than 50nm work the best.
- Keep the ISO sensitivity of the camera low (preferable 100-200, not more than 640) when you photograph clothing items.
- For the camera aperture, f/8 to f/11 are most suitable to photograph clothes.
- Keep the white balance in check to bring out the accurate color of the fabric.
- The standard shutter speed for photographing garments is 1/125.
- Click pictures from different angles and sides to give the customers a better idea of the product.
- You should click some close-up shots showing off the details of a dress.
- Upload multiple photos of the same product so that the customers can get the proper idea about the clothing item.
- Last but not least, get the photos edited by experts.
Final Words
Clothing photography seems easy, but it takes so much preparation, hard works, and dedication in reality. Some may say that it’s the photographer’s talent that made him successful in the fashion industry. Yes, that’s true, but not entirely.
A photographer doesn’t only depend on his talent. He prepares a photoshoot step by step so that nothing is missing. But still, there can be something that you may forget. That’s why we have tried to list out everything we could think of about how to photograph clothing items. You can just take a look and see if you have forgotten anything.
We have also added some tips and tricks in the last part of the article. We believe they can help to take amazing shots of attires. Hopefully, the article was helpful for you. We wish you good luck with your photography career.
Contact Us:
Clipping Path CA is a renowned outsourcing image editing company in the USA. We provide all types of services related to Photoshop and photo editing. We have expert editors who are promised to give the best quality work to our clients. You have the right to complain if you don’t like our editing, and you can request a redo service. And we provide all of these services at a very nominal price.
FAQ:
1. What is clothing photography?
Answer: When you click beautiful pictures of clothing items for your online business or promote a brand, it is called clothing photography.
2. How clothing photography impacts the sale?
Answer: Good looking photos attract more customers. If you post an attractive picture of a beautiful dress, customers will automatically get attracted to it and buy it. That will increase your business.
3. How do I take photos of clothes with a DSLR?
Answer: Set the camera on a tripod for stability. Now keep the ISO low. Keep the aperture between f/8-f/11. Take care of the white balance and press the shutter. There you have a beautiful photo.
4. What is a ghost mannequin?
Answer: It is an effect that is done during the post-production of photos. First, you need to shoot with a model or a mannequin. Then you need to remove the model or mannequin using Photoshop during post-production. It is mainly done for keeping the customer’s attention to the product only.
5. How to photograph clothes without a model or mannequin?
Answer: If you don’t have a model or mannequin to shoot with, go for flat lay photography. All you need to do is lie down the clothes flatly on the floor and then take pictures of them. But be careful with the wrinkles and folds.
6. What is the ideal camera setting for clothing photography?
Answer: The ISO sensitivity should be 100 to 200 (not more than 600-640), the aperture should be between f/8 to f/11, shutter speed 1/125, and white balance should be set according to the light source.


