A curved text is undoubtedly more eye-catching than a regular one. That’s why designers now prefer to use curved texts to create logos, badges, labels. But how is it created? Aren’t you curious to know? In this article, we will tell you how to curve text in Photoshop in simple ways.
Beginners often have a misconception that creating curved texts in Photoshop is difficult. But I’m telling you, it’s completely wrong! We have listed two simple ways of bending texts to clear out this misconception. Just follow some steps serially, and the final result will surely amaze you.
Are you ready to learn something new? Let’s dive into the article!
- How To Curve Text In Photoshop?
- Step-1: Open A New Document
- Step-2: Customize The New Document
- Step-3: Divide The Document
- Step-4: Fill In Solid Color
- Step-5: Choose The Ellipse Tool
- Step-6: Draw The Circle
- Step-7: Lock The Layers
- Step-8: Draw The Second Circle
- Step-9: Insert Text
- Step-10: Align The Text
- Step-11: Duplicate The Layer
- Step-12: Change The Start And End Point
- Step-13: Insert Text In The Lower Part
- Step-14: Resize The Text
- Step-15: Remove The Solid Background
- Step-16: Clear Guides
- Step-17: Save The Design
- Step-1: Open Image
- Step-2: Drag The Image
- Step-3: Save The New Design
- Step-1: Open A New Document
- Step-2: Customize The New Document
- Step-3: Choose The Pen Tool
- Step-4: Create Path
- Step-5: Deselect The Path
- Step-6: Insert Text
- Step-7: Position The Text
- Step-8: Save The Design
- Here Is The Video Tutorial:
- Contact Us:
How To Curve Text In Photoshop?
Photoshop is like a blessing to photographers and designers. They can create amazing images, posters, logos, banners, and templates just with some clicks with Photoshop’s help. And just like a cherry on top, bending or curving the words or texts gives their designs a tremendous look.
You don’t need to be an expert to create a curve text in Photoshop. All you need to do is follow instructions correctly. There are different ways of curving texts. But we have listed two simple ways that even a beginner can follow easily.
Method-1: Create Curved Text In Photoshop Using Ellipse Tool
For warping a text around or inside a circle, the Ellipse tool is the best option. Let’s take a look at how it works.
Step-1: Open A New Document
Firstly open the Adobe Photoshop app on your laptop or PC. A black background will come into view as soon as you open the app. But you can’t work on that background. You need to open a new file/document.
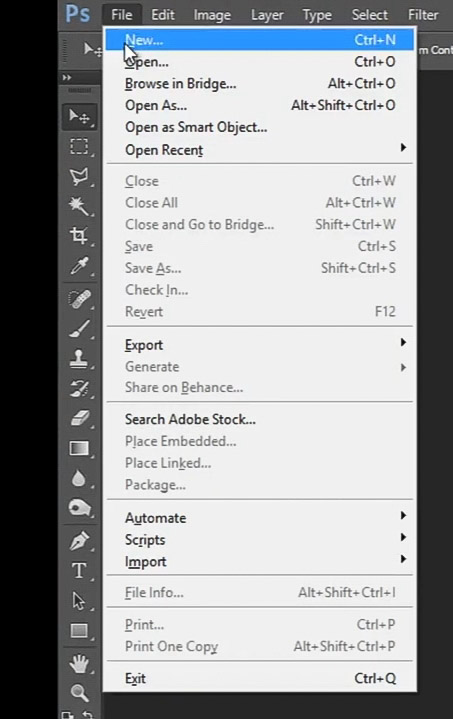
On the Menu bar, you will find the ‘File’ option. Click on that. Many options will pop up in front of you. You need to click on the first option named as ‘New’ among the others. A new page will open. This is the manual way. There’s a shortcut too for this. It is ‘Ctrl+N.’
Step-2: Customize The New Document
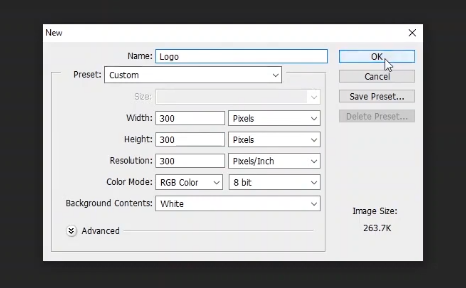
As soon as you click on ‘New,’ a box will appear. You can select your file size, background color, and the name that you want to give to the document in that box. After setting everything according to your wish, click on ‘OK.’
Step-3: Divide The Document
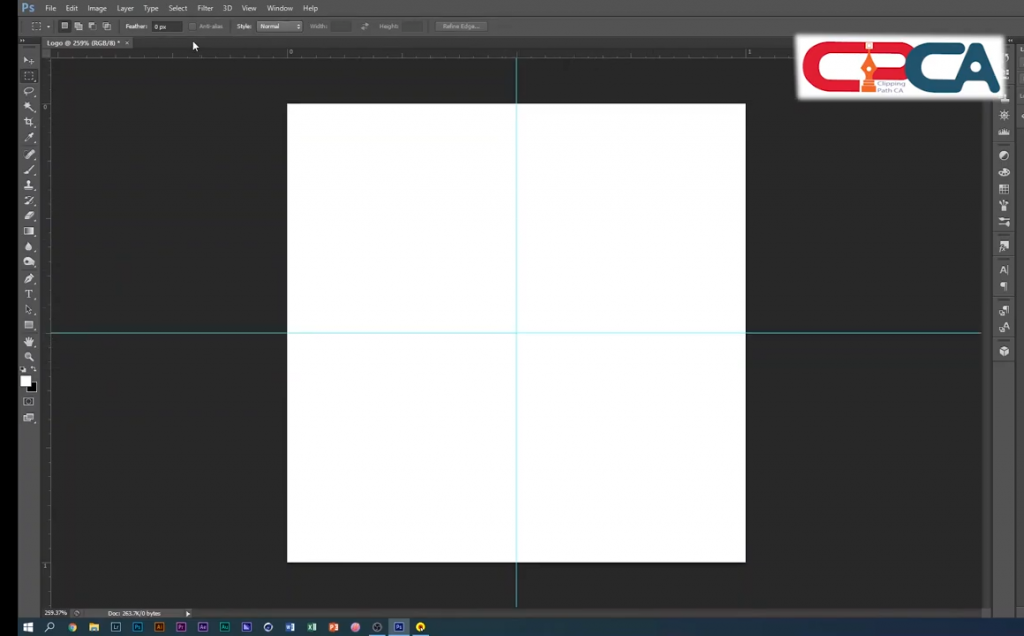
After opening the document, you can see scales on the upper side and left side as well. If you can’t see them, enable them from the Menu bar using ‘View >Rulers’ or press ‘Ctrl+R’ on your keyboard.
Now, click on the scales and drag them to the middle. Do this on both sides, up to down and left to right. In case you can’t snap the rulers, enable ‘Snap’ from ‘View >Snap’ on the menu bar.
You can see that your document has been divided into four equal parts. This is mainly done for creating a perfect circle later on.
Step-4: Fill In Solid Color
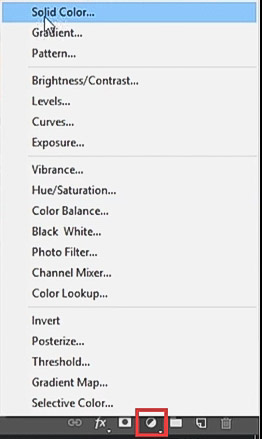
There’s a circle-shaped icon on the lower right corner of Adobe Photoshop. In this part, you need to click on that. When you click, you will see an option ‘Solid Color’ at the very first of the column. Click on it and select any color to fill in the document.
Step-5: Choose The Ellipse Tool
On the left side, there’s a toolbox with lots of tools. Find a square-shaped icon on the lower part. This is the shape tool. You can also enable it by pressing ‘U’ on the keyboard.
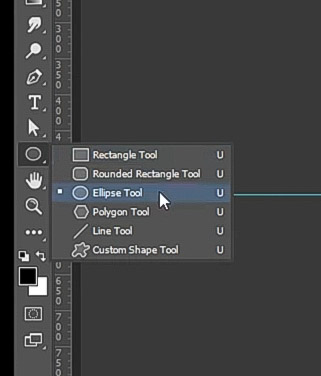
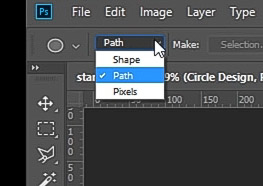
Choose the ‘Ellipse Tool’ among the other shape tools. It’s positioned in third place with a circle drawn on the left side. Now ensure that the ‘Path’ option is selected on the menu bar.
Step-6: Draw The Circle
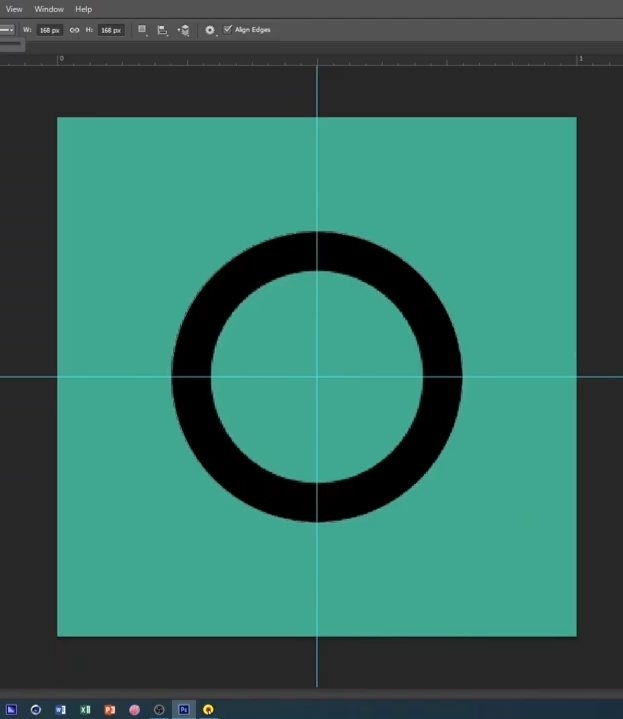
After choosing the Ellipse tool, adjust the stroke size and color on the menu bar. After doing that, you are ready to draw the circle.
Click on the center where the vertical and horizontal scales have met. Now drag the cursor to draw. Press’ Alt’ to place the circle in the middle and ‘Shift’ to create a perfect circle.
Step-7: Lock The Layers
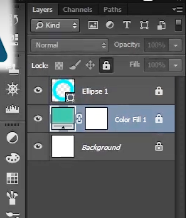
In this stage, you need to lock the layers that are shown on the right side. It is for protecting the background.
Step-8: Draw The Second Circle
Now you need to draw the second circle following the same steps as the first one. You need to insert this new circle inside the first one. It’s because we will be typing words inside a circle.
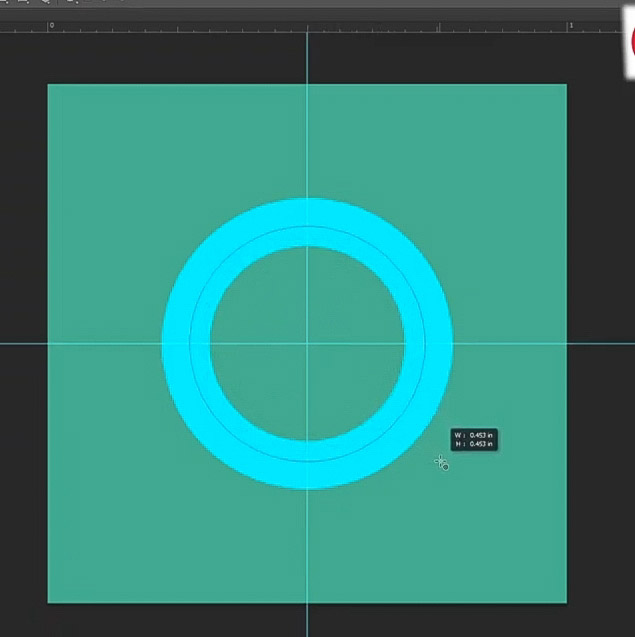
Step-9: Insert Text
Select the ‘Type Tool’ from the toolbar. It has the symbol’ T,’ in case you can’t find it. Now adjust the size, color, font in the upper menu as you wish.
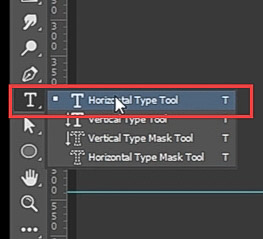
Click on the upper surface of the second circle. The cursor will change into an ‘I’ with a curve line in the middle. Now type whatever you want.
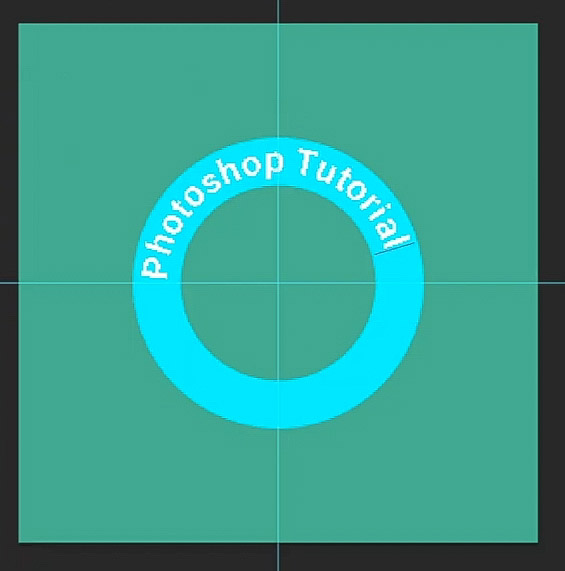
Step-10: Align The Text
The most efficient way to align text is using the ‘Path Selection Tool.’ Select the tool from the toolbox and click anywhere on the circular path.
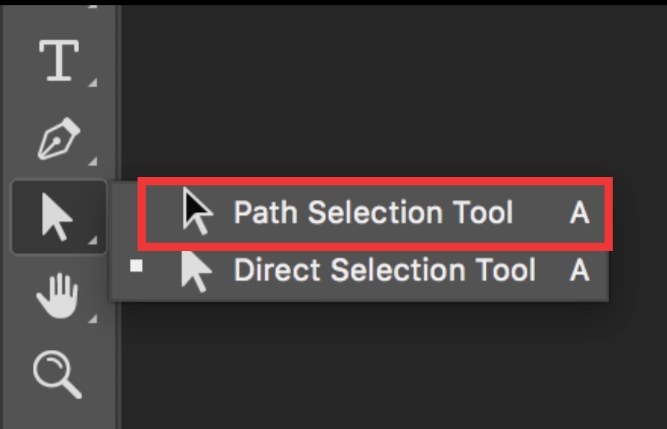
Wherever you click, it will become the starting point of your text. So, select your starting and ending points to place the text.
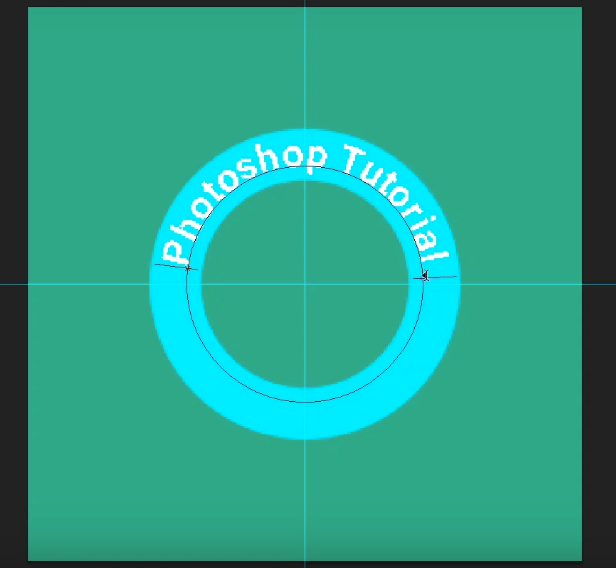
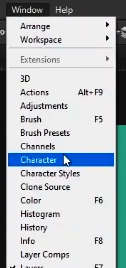
Now, find the ‘Windows’ option in the menu and select ‘Character’ from the list.
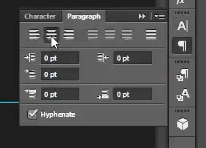
A box will pop up on the ride side. Go to the ‘Paragraph’ option and align the text on the center or the left/right side.
Step-11: Duplicate The Layer
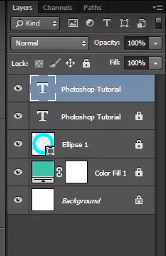
Now, we will insert text in the lower part. For that, you need to duplicate the text layer first. Keep the ‘Text’ layer selected on the right side and press ‘Ctrl+J’ on the keyboard. You can see a new layer has been added.
Step-12: Change The Start And End Point
Select the ‘Path Selection Tool.’ Now click on the start point of the path, drag it to the opposite side, and leave it. Do the same with the endpoint too. We are basically swapping the position of start and endpoint.
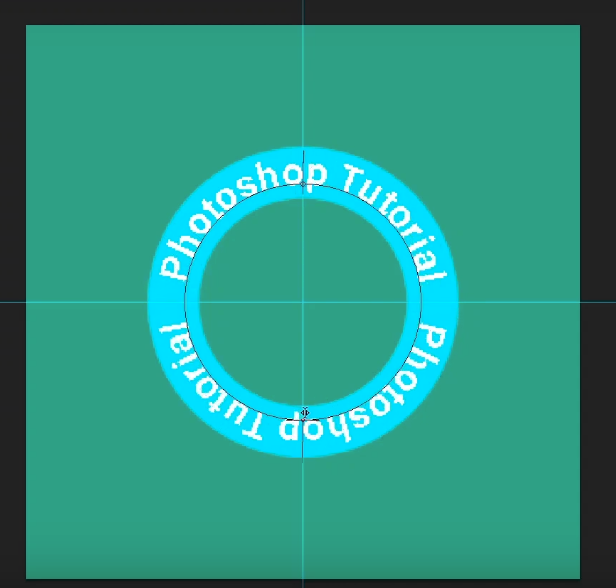
Remember, we are doing all of these on the duplicate layer that we created earlier. The original layer is locked.
Step-13: Insert Text In The Lower Part
After changing the points, you can see that the upper part’s text has been copied to the lower part. Click anywhere inside the circle to align the text inside.
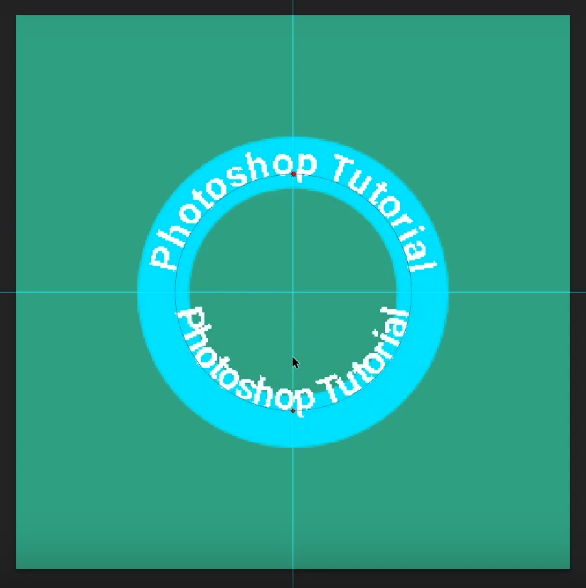
Step-14: Resize The Text
Right now, the upper and lower texts are in different sizes. That’s why we are going to resize the text on the lower part.
Press on ‘Ctrl+T’ to add a square box around the circle. Now, press ‘Alt+Shift’ together to adjust the circle with the upper text. Press ‘Enter’ once you are done positioning the circle.
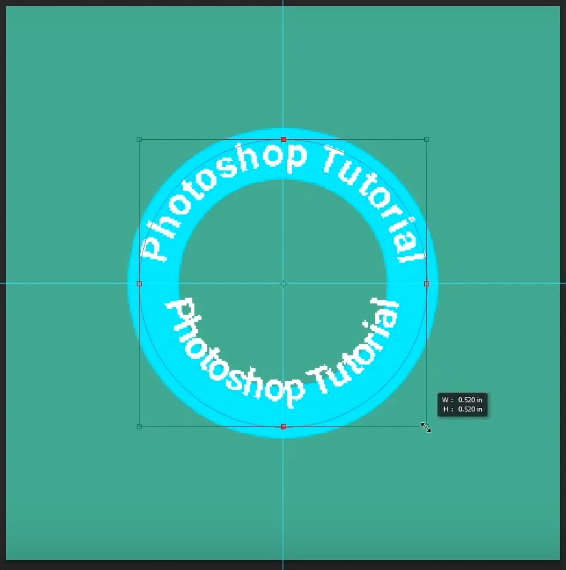
When you are done resizing, edit the text however you want.

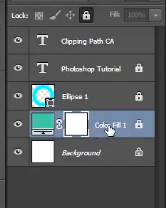
Step-15: Remove The Solid Background
Unlock the slide where you filled your background with a solid color. Click on that to remove the solid color.
Step-16: Clear Guides
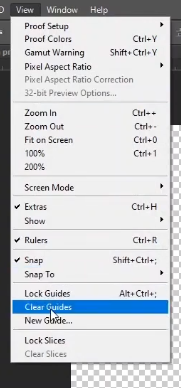
Go to the ‘View’ on the menu bar and select ‘Clear Guides’ from the menu list. It will clear out the rulers and lines that you created during the design.
Step-17: Save The Design
All of your efforts will go in vain if you don’t save the design. So it’s essential to save files once you are done editing.
Go to the ‘File’ menu and select ‘Save As.’ Give the file a name and choose a format. Now choose a place where you want to save it and click on ‘Save.’
Additional
If you want to place any pictures inside of the curved texts, follow the instructions given below.
Step-1: Open Image
To add an image, you need to go back to the ‘Step-15’ mentioned earlier. Remove the solid background, as we described.
Now go to ‘File’ and select ‘Open’ to open an image from your device. Or you can use the ‘Ctrl+O’ command.
Step-2: Drag The Image
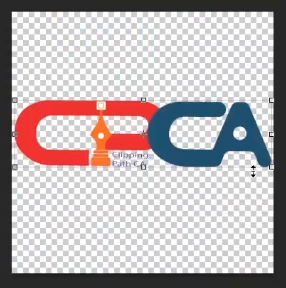
Select the opened image and drag it upwards to go to the previous slide. Now adjust the size of the image and place it in the center.

Step-3: Save The New Design
Now follow the ‘Step-16’ and ‘Step-17’ to clear guides and save your new design.
This part is totally optional. You can skip this part if you want.
And that’s it! You have successfully created a curved text inside a circle.

Method-2: Create Curved Text In Photoshop Using Pen Tool
The pen tool is useful when it comes to creating random paths. Also, the process is very easy. Curious to learn the process? Let’s get started!
Step-1: Open A New Document
You already know how to open a new document on Adobe Photoshop. Select ‘New’ from the ‘File’ menu or press ‘Ctrl+N’ on the keyboard.
Step-2: Customize The New Document
Select the size, background, type of the new document from the Customization box. When you are done, click on ‘OK’ to move to the next step.
Step-3: Choose The Pen Tool
You can find the icon of a pen’s nib in the toolbox. That’s the ‘Pen Tool.’ Select it. Make sure ‘Path’ is selected on the menu bar.

Step-4: Create Path
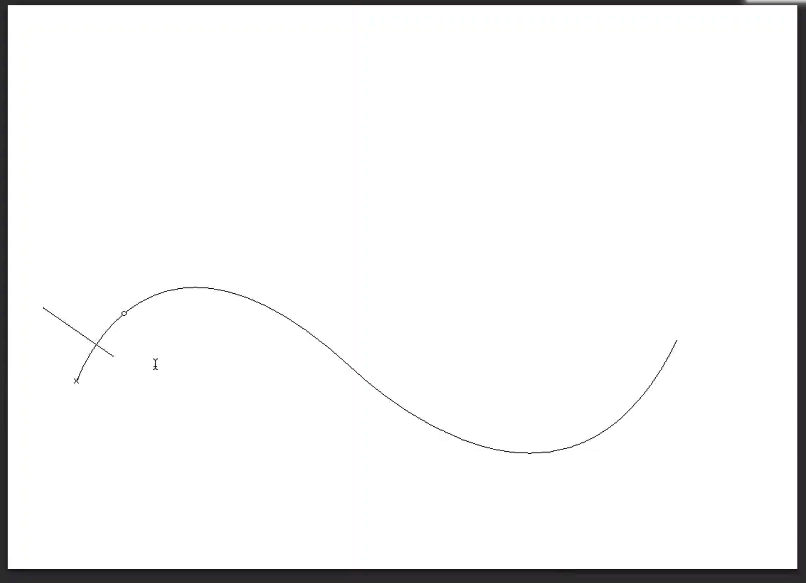
Make a starting and ending point just by clicking on the document. Click and hold the endpoint to join two points. Now drag the endpoint to curve the path.
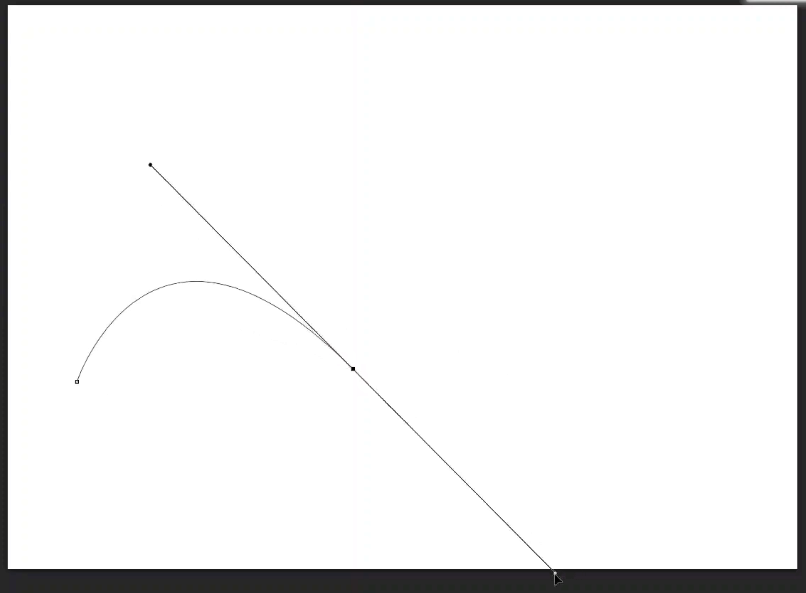
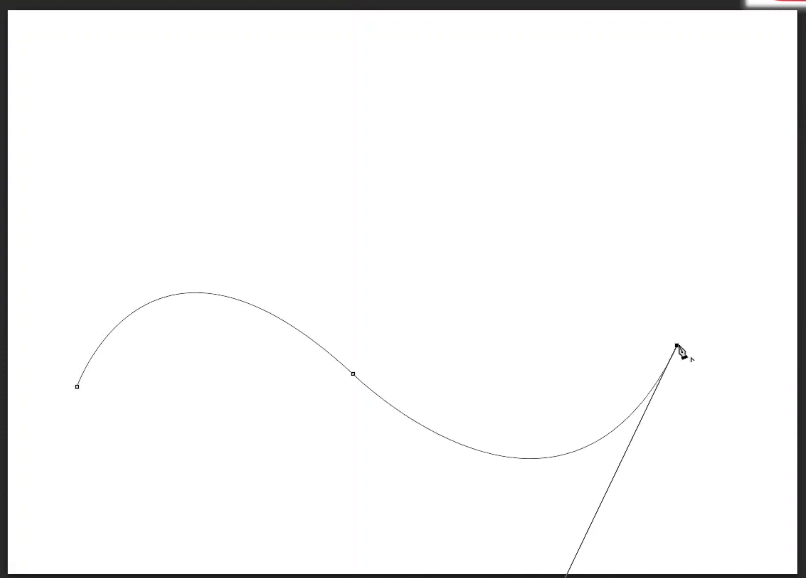
It’s not necessary to create a path with just two ends. You can similarly add multiple curves only by joining ends.
Step-5: Deselect The Path
When you are satisfied with your path, press the ‘Ctrl key and click anywhere in the document. It will deselect the path-creating mode, and you can see a nice curve on the page.
Step-6: Insert Text
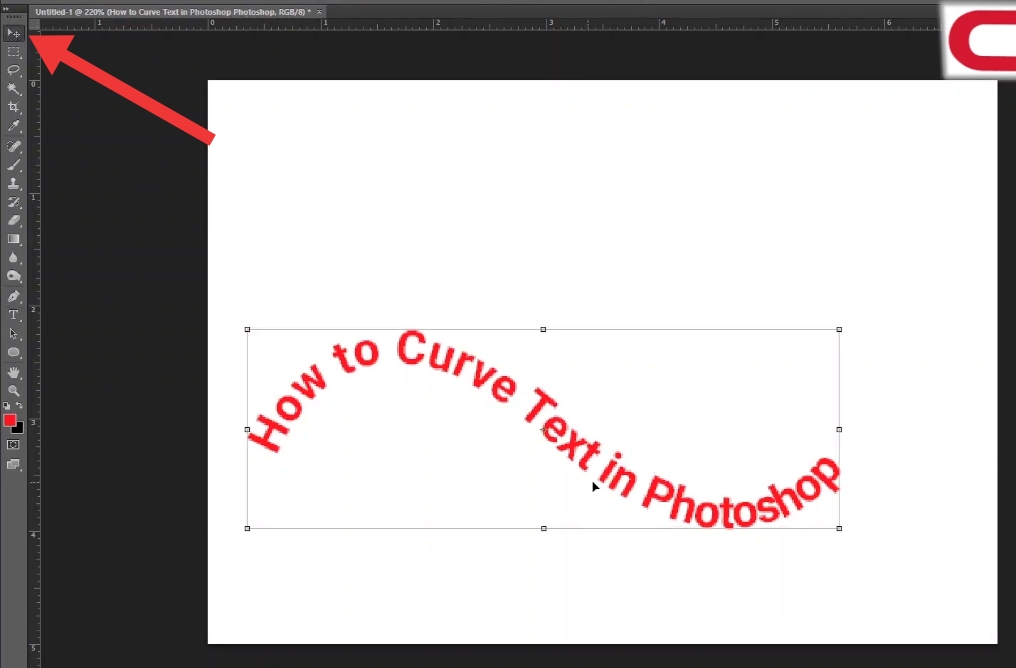
Grab the ‘Type Tool’ from the toolbox. Click anywhere on the curve line. Now you can type whatever you want on the path.
Step-7: Position The Text
You can move the text anywhere on the page by clicking on the ‘Move Tool’ from the toolbox.
Step-8: Save The Design
Create as many paths as you wish. When you are done, don’t forget to save your design. Go to the ‘File’ menu and click on ‘Save As.’ Name your document, choose the format, and select the place where you want to save it. Click on ‘Save’ to complete the whole process.
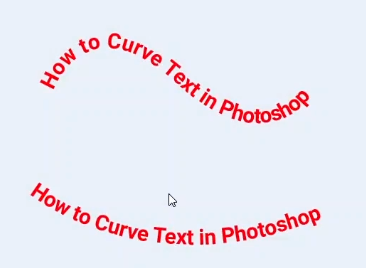
Congratulations! You have created a curved text on your own!
Learning new things is always exciting. And proper instructions make the whole thing easier. We hope this tutorial was helpful to you. We have tried to put everything as thoroughly as possible.
Still, if you have any inquiries, feel free to comment. We will try to solve your problem. We wish you a great experience with Photoshop!
Here Is The Video Tutorial:
Contact Us:
If you think you need to get some images edited but don’t have enough confidence to do it yourself, you can contact Clipping Path CA.
We are one of the leading companies in the USA to provide all types of Photoshop services. We have expert designers to give you the best quality work at a reasonable price.
We are available 24/7 hours for our clients. Just give us a call whenever you need us.


