It is beyond any doubt that photography is an exciting way to show your creativity. It helps us to tell stories and create a professional-looking portfolio. Well, that is even true for students. You can capture professional-looking images with little to no cost.
But how can you do so? In today’s comprehensive guide, we will show you around 20 creative photography ideas for students that can be fully adaptable to your lifestyle as a student. Just read on.
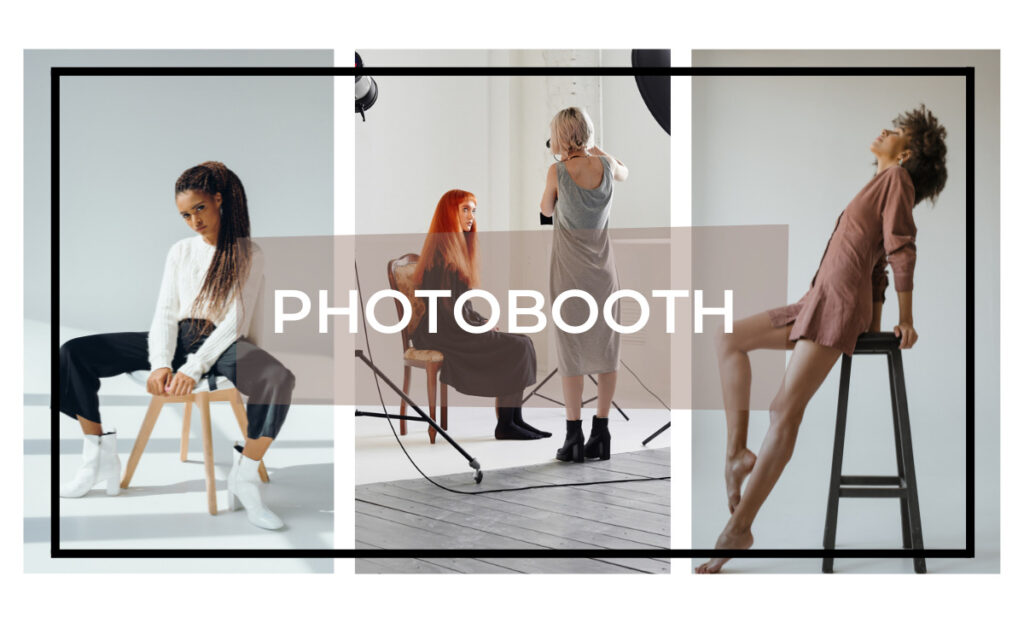
Starter Photography Equipment Recommendations For Students
| Starter Kit Tier | Essential Items | Approximate Price Range (USD) |
| Under $20 | • Smartphone tripod or flexible mini tripod • Clip-on macro or wide-angle lens • Mini LED keychain light • DIY reflector. For instance, white poster board or aluminum foil | $8 – $20 |
| Under $50 | • Adjustable smartphone tripod • Clip-on lens set • Small USB LED panel • Portable 5-in-1 reflector | $25 – $50 |
| Under $100 | • Tripod with remote shutter • Higher-quality clip-on lens set • Portable LED panel with dimmer • Mini softbox or diffuser • Optional: used an instant camera like Lomography or Fuji Instax | $60 – $100 |
20 Creative Photography Ideas For Students
Here comes our main discussion! In this section, let’s check out around 20 creative photography ideas you can try as a student.
1. Window light portraits

The first comes from using window light to take professional-looking images. You know the light comes from the window in a naturally soft way. That is because it spreads over a large surface before reaching your window. It creates gentle shadows and smooth skin tones.
That is why window lighting is ideal for
- Portraits
- Profile photos, and
- Product shots.
To take window light images, place your subject at a 45-degree angle to the window. If the sunlight is harsh, you can use a thin curtain. You can even tape a piece of tracing paper over the window to diffuse it further. Now have your subject face the window directly and take the image.
If you want to shoot the most eye-catching image, you should shoot during the morning or late afternoon. Of course, it also has a reason! It is because of the lower angle of the sun during this time of day.
2. Shadow play

You can also use natural sunlight to play with the shadow and take attractive images. You know, when sunlight becomes strong during late morning or early afternoon, it creates a defined look.
During this time, you can use the harsh sunlight creatively. How? You can shape shadows into patterns or storytelling elements. Just place your common household objects between the light source and your subject. Here you can use items like
- Window blinds
- Lace fabric
- Leaves, or
- Kitchen strainers
They can produce interesting shadow patterns on your face or the background surface. Now shoot for the image from your desired angle.
If you are using a smartphone for taking the images, you should lower the exposure slightly to preserve detail in the highlights. It will result in a cleaner and more polished look.
3. Reflection photography using household surfaces

In this photography idea, you can use mirrors, polished tabletops, tiles, metal trays, and even the surface of a switched-off phone as reflective elements. You can use this reflection photography to transform simple scenes into something more artistic.
Here, you have to place your subject close to the reflective surface. Now lower your camera or smartphone until it’s almost touching the surface. You can also tilt mirrors at different angles. A tilted mirror can place your subject inside a reflected sky or interior light.
4. Silhouette photography at sunrise or sunset

No need to mention, especially how breathtaking silhouette photography looks. So, why don’t you try it also? Just scout a location where the horizon is clear and unobstructed. Now place your subject against the brightest part of the sky. You have to ensure there are no distracting elements that break the outline. Now make poses that are easily recognizable in outline. For instance, jumping, dancing, or holding props.
5. Forced perspective with everyday objects

In this photography idea, you carefully position your subjects and objects relative to the camera. For instance, you can make a person appear tiny beside a book or look like they are balancing on a distant object.
Here, you have to select a simple background and identify objects that can interact with your subject. You have to place the object carefully. If you place the object close to the lens, it will appear larger and vice versa. Now have your subject move forward or backward until the visual illusion is achieved.
6. Minimalist flat-lay using school supplies

It is a simple concept. In this photography idea, you have to arrange your objects on a flat surface and photograph them from directly above. The approach is effective for portfolios, social media content, or class projects.
First, you have to select a neutral or plain background. It can be a desk, a tabletop, or a floor. Now gather your items like stationery, notebooks, gadgets, or even food. Now strategically place your items. If you are using smartphones, you should adjust exposure and focus precisely.
7. Motion blur with slow-shutter apps

Well, this idea is about capturing a moving subject with a slower shutter to create visually compelling images. Here, first you have to select a subject in motion. Now you have to use the motion blur feature of your mobile phone.
You know many smartphones in 2026 include built-in long-exposure or “motion blur” modes. However, if your smartphone does not have the feature, don’t stress out. You can use free apps like Slow Shutter Cam or Adobe Photoshop Express in this regard.
Next, you have to stabilize your phone using a tripod or any flat surface. Now you have to adjust settings to lengthen exposure time while the subject moves through the frame. Shoot for the image.
8. Natural “Bokeh” from lights in the background

It is another attractive and interesting photography idea you can try. This technique also does not need any extra equipment. You can take the images simply by using natural things.
In this technique, you have to place your subject closer to the camera and keep the background farther away. Now, on your smartphone, you have to select portrait mode or tap on the subject to lock focus. It will naturally blur the background and will keep the subject sharp.
You take bokeh images in the evening. That is because during this time, you can enhance the size and brightness of bokeh highlights.
9. Shadow self-portraits

In this approach, you use the shadow of a subject cast on walls or floors. You can create dramatic images through this technique that are suitable for class assignments and personal projects.
You have to position a strong light source behind you or the subject. For instance, it can be a window with sunlight, a lamp, or even streetlights. You have to ensure that the background is flat and uncluttered.
Now experiment with poses to create interesting outlines. Remember that the angle of the light in comparison to the subject determines the length and direction of the shadow. So adjust it carefully to get the desired effect.
10. Using a phone flash against a wall

Image source: Inspirationlaboratories
The reason? That is because here you have just to select a plain wall or a lightly textured surface behind your subject. Now, you have to position your subject a few feet away. It will help to avoid the harsh flat lighting typical of direct flash. Next, aim the phone’s flash toward the wall rather than directly at the subject.
What will happen next? The light will bounce off the wall and will spread softly over the face and upper body. You can experiment with distances and angles to achieve different moods.
11. Plastic wrap lens filter

When we are trying to take stunning images, a simple plastic wrap lens filter can do the magic. This lens filter diffuses light entering the camera lens and reduces harsh contrasts. You can use it as an inexpensive alternative to professional diffusion filters.
Here, you have to take a small piece of clear plastic and wrap it loosely over the smartphone. You should secure it carefully with a rubber band or tape if necessary. You should avoid pressing the wrap too tightly. That is because wrinkles or tightness can distort the image excessively. You can also poke a tiny hole in the center of the wrap to maintain a sharp focal point.
12. Fairy light portraits

In the world of creative photography ideas, a small string of LED fairy lights comes next. Just place your subject in a dimly lit environment. Now wrap the lights around the subject or position them in the background. It will produce soft bokeh when the background is slightly out of focus. You can also combine fairy lights with other DIY techniques. For instance, reflective surfaces or transparent fabrics to enhance your creativity.
13. Colored paper backdrops for small products or portraits

You can use bright and contrasting color paper as a background to create energetic compositions. You have to tape the paper to a wall or drape it over a table. If you are taking flat-lay photography, you should place the colored sheet flat on a table. Then you have to arrange your items with the correct balance and spacing.
14. Using a spray bottle to create fake rain

It is all trendy now, circulating all over social media, creating a rain effect using bottles. So, you should also try this photography idea for your next photography session. You should also try to include natural backlighting or soft side-lighting. That is because it enhances the sparkling effect of the droplets and adds depth to the image.
15. DIY prism filter using a CD or DVD edge

You can also use a simple CD or DVD as an effective prism filter for your creative photography. In this technique, you have to take your CD and hold it at an angle in front of your camera lens. It will allow the sunlight or artificial light to reflect off the reflective surface.
You can also rotate or tilt it slightly to produce rainbow streaks or light flares in the frame. If you want more control, you can cover part of the lens with a piece of opaque material. Here, you have to leave a small section uncovered through which the light can pass.
If you want, you can also combine the CD effect with other techniques. For instance, fairy lights or motion blur.
16. Shooting through transparent fabrics

This photography idea allows gentle diffusion of light and softening of shadows. It is especially useful for portraits, conceptual photography, and experimental art projects. Select a lightweight and semi-transparent fabric. Now place it between the camera and your subject.
Here are some things you need to keep in mind.
- First, the distance between the fabric and the lens affects the level of softness.
- Second, if you place it closer, it produces a dreamy and hazy effect
- Thirdly, fabric closer to the subject creates more defined patterns and texture.
- Fourth, natural light works best.
17. Using page reflections from a book

It is a simple but highly professional-looking technique. In this technique, when you position an open book near a light source, the reflected light can act as a natural fill. It softens shadows and illuminates the subject gently.
If you are using smartphones, you should use the tap to focus on the subject. You can experiment with different book sizes, angles, and page textures to add creativity to each shot.
18. Using leaves or plants as foreground elements

You can use this technique for your outdoor and indoor photography. Here, you select leaves, branches, or potted plants. Then you place them close to the camera lens, making them partially blurred. Then you take the stunning and attractive images from different distances, angles, and types of foliage.
19. DIY light beam using dust + window light

In this technique, you choose a room with strong natural sunlight streaming through a window. Then you have to introduce fine dust, flour, or a light mist from a spray bottle into the beam of sunlight.
The particles scatter the light and create a three-dimensional effect. Now you have to position your subject within or just outside the beam, and you take images with different intensities, angles, and distances of the light.
20. Shooting through a water glass

By placing a clear glass filled with water in front of the camera lens, you can create a surreal effect in your photography. However, keep in mind that, in this technique, the light has a very crucial role. Here, natural side lighting or backlighting enhances the clarity of the water. It intensifies the refracted patterns and adds drama to the photography.
Background And Prop Builds Ideas For Students
When creating a professional-looking image, the background also plays a significant role. You can use a few inexpensive materials can build professional-looking backdrops and props using your creativity. How can you do so, right? Just check it out below.
1. Paper and fabric backdrops
You can use colored paper or bedsheets to create versatile backgrounds. You can drape a solid-colored sheet on a wall or tape it over a table. It will create an infinity curve to eliminate hard edges. You can also use scrumpled paper or linen to add extra depth.
2. Spray snow or window frost effect
You can also create winter or foggy scenes using spray snow or flour dusting. Just spray snow or flour lightly on glass or windows. It will create a dreamy background effect. Now shoot through for a soft and cinematic look.
3. Textured boards and DIY wooden props
Wooden crates, cardboard, or textured foam boards can also help you to create a professional background for your photography. You can use mixed wood, paper, and fabrics to create depth. It is also very trendy now.
4. Hang props or mobile elements
You can hang props like lightweight paper shapes, strings of beads, or fairy lights. They will help you to add interest. That is especially true for portraits or concept photography. You can also use fishing wire or thread, paper cutouts, fairy lights, and tape for this purpose.
5. Everyday household items as props
You can also use your household objects as a background, showing your creativity. You can use the objects of your home, such as mirrors, glasses, kitchen utensils, or even plants. For instance, you can shoot through glass jars for lens distortions, or arrange plants as natural frames.
Image Editing Technique For Students
| Workflow | Apps (Free / Budget-Friendly) | Steps | Tips |
| Mobile Color and Light Adjustment | Snapseed and Lightroom Mobile | 1. Adjust exposure, contrast, and highlights. 2. Use selective tools to brighten or darken areas. 3. Fine-tune saturation and warmth. | Keep edits subtle for natural and professional results. |
| Cropping and Composition Fix | VSCO and Photoshop Express | 1. Crop using the rule of thirds or remove distractions. 2. Straighten horizons and vertical lines. 3. Apply a mild vignette or blur to emphasize the subject. | Cropping teaches framing and composition skills for future shoots. |
| Creative Effects and Filters | Instagram and Pixlr | 1. Apply filters to set the mood. 2. Adjust intensity manually. 3. Combine multiple filters or layers for signature style | It creates a professional-looking portfolio. |
| AI-Powered Quick Edits | Canva AI Photo Editor and Remove.bg | 1. Remove or replace backgrounds. 2. Use AI suggestions for color correction and enhancement. 3. Experiment with overlays, sky replacement, and lighting tweaks. | Always review AI results manually to maintain a natural look. |
Conclusion
Well, as you see, photography is all about seeing your environment and the world creatively. With this simple thing, you can take professional-looking images even using just your smartphone and household items.
So, what to waiting for? Start today! Get your idea from our guide, grab your camera, and start photographing confidently.