When it comes to an ecommerce business, product images have the ultimate power to make or break. And here, the ghost mannequin is the technique that the apparel businesses use to show the real style and shape of the garment.
On top of that, ghost mannequin editing is not a very hard nut to crack. However, a little bit confused as you’ve never done it before? Don’t worry! If you want to try the ghost mannequin editing for your online business, we are here to help you out.
In today’s beginner-friendly guide, we’ll comprehensively discuss ghost mannequin editing in Photoshop. Just read on!
Checklist Before Starting Editing
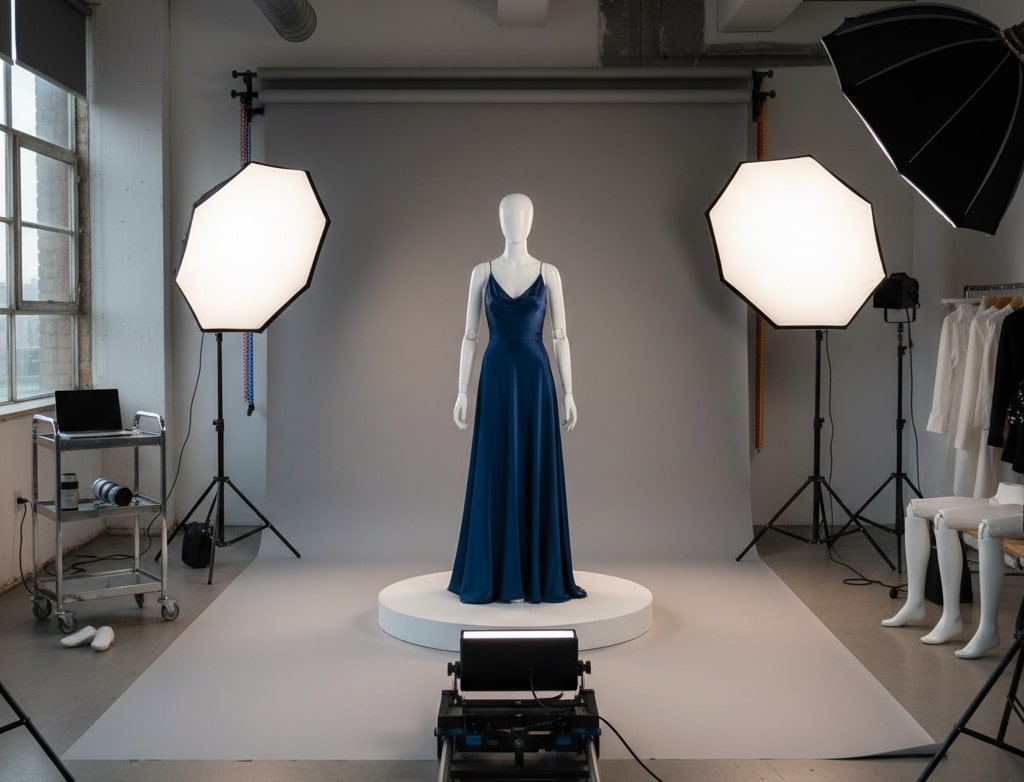
First of all, we will need the images and the right equipment before starting editing. Let’s go through everything you will need for ghost mannequin editing.
1. Equipment and Setup Requirements
| Equipment | Recommended Type | Purpose |
| Camera | DSLR or Mirrorless | You should use manual mode to ensure good exposure |
| Lens | 50mm or 85mm Prime | You should avoid wide-angle distortion. |
| Tripod | Sturdy and adjustable | You should keep the camera fixed for correct framing |
| Lighting | Two softbox lights or LED panels | Ensure shadow-free lighting on both sides of the garment |
| Backdrop | White or light grey background | It makes it easier to remove in Photoshop later |
| Mannequin | Plain torso mannequin | It helps capture the natural shape of the clothing |
2. Recommended Camera Settings
| Setting | Recommendation | Why It Is Important |
| Mode | Manual | It keeps brightness and color consistent |
| ISO | 100–200 | It reduces image noise and grain. |
| Aperture | f/8 – f/11 | It keeps the entire garment in focus |
| Shutter Speed | 1/125 – 1/160 sec | It prevents motion blur |
| White Balance | Daylight or Custom | It keeps accurate colors between shots |
3. Capture the Right Shots
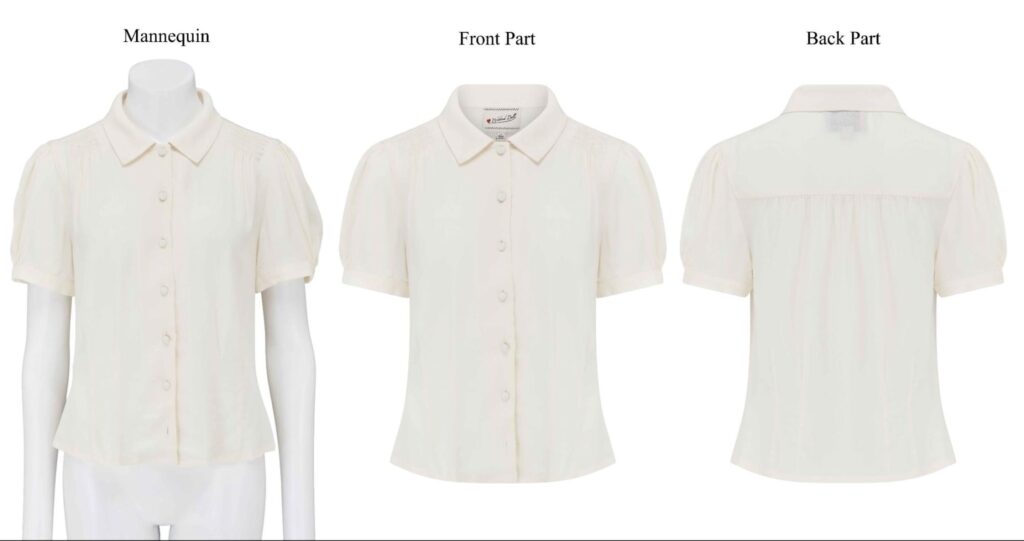
You’ll need at least two or three photos of each garment for the ghost mannequin editing. For instance,
- Front view: It shows the main design of the garment.
- Back view: It shows the back structure or tags.
- Inner or Neck view: It is taken from above or behind to show the inner collar.
- Optional detail shots: Sleeves or cuffs.
Basics of Photoshop
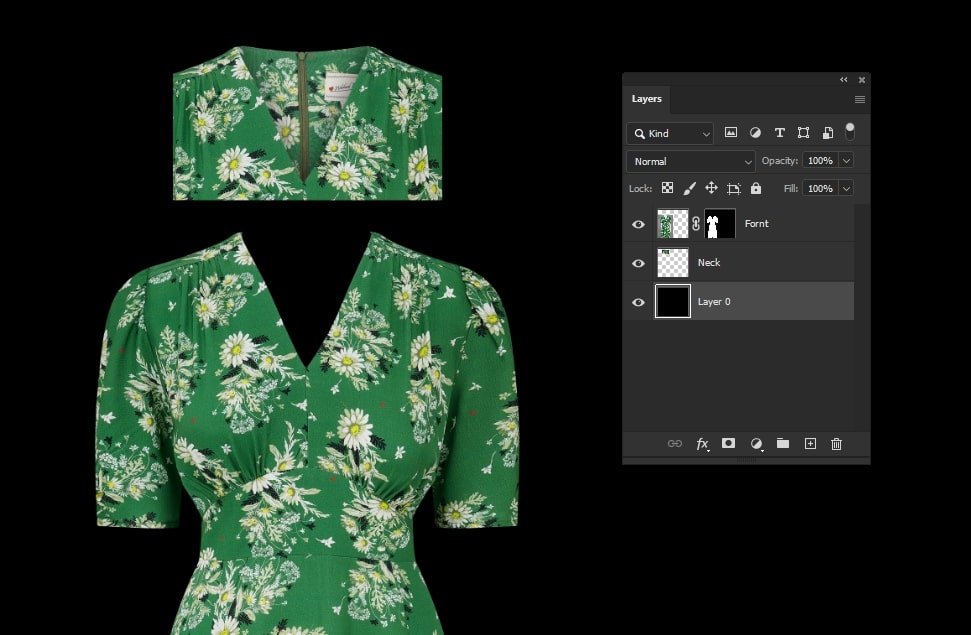
Now, let’s learn about some basic but essential things about Photoshop. It will help you out with your ghost mannequin editing. Check it out below.
1. Layers
In Photoshop, layers are like transparent sheets stacked on top of each other. Here, the bottom layer can be your inside-neck photo, or the top layer can be your main clothing image. You can hide or move layers to get the precise result.
2. Masks
When editing, you’ll need to remove parts of the mannequin or background. Here, you can use the Eraser Tool. However, it can permanently delete pixels. That’s why you should use Layer Masks. You hide or reveal parts of a layer without deleting anything from it.
| Color on Mask | Effect |
|---|---|
| Black | Hides pixels |
| White | Reveals pixels |
| Grey | Partially hides pixels |
3. Pen Tool
The Pen Tool gives you total control when you are selecting or cutting out your mannequin.
How it works:
- Select the Pen Tool.
- Click around the outline of your garment to create anchor points.
- Close the path >> right-click >> choose Make Selection.
- Feather the selection slightly.
4. Selection Tools
| Tool | Shortcut | Best Use |
| Quick Selection Tool | W | For large, well-contrasted areas |
| Magic Wand Tool | W | Selects similar colors |
| Lasso Tool | L | For rough, freehand selections |
5. Adjustment Layers
During editing, when you combine two images, sometimes the lighting may not match perfectly. In such cases, you can use adjustment layers. Here you can use:
- Brightness or Contrast to match light levels.
- Curves to control shadows and highlights.
- Saturation to balance colors.
- Levels to fine-tune exposure
7. Saving and File Formats
You can save your file with a different file type in Photoshop.
| File Type | When to Use | Notes |
| .PSD | During editing | It keeps all layers intact. |
| .PNG | For transparent background images | It is perfect for online stores |
| .JPG | For solid white backgrounds | It offers a smaller file size for faster uploads |
How to Do Ghost Mannequin Editing in Photoshop
Now we are all ready with our preparation. Let’s move ahead to ghost mannequin editing in Photoshop. Here we will discuss step by step for your easy understanding. Just follow the steps carefully.
Step 1: Set Up Your Photoshop Project
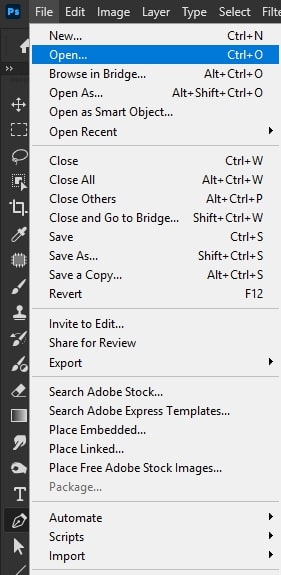
First, open your Photoshop and create a new document. If you have eCommerce images, you should have a large canvas with 300 DPI resolution. As for the beginning, 3000 pixels wide and 4000 pixels high will work best. Next, you have to import all your garment photos as separate layers.
You should rename each layer clearly. In that way, you will not become confused later. If you want, you can also convert each layer into a Smart Object. It will help you to resize or adjust layers without losing quality.
Step 2: Align Layers
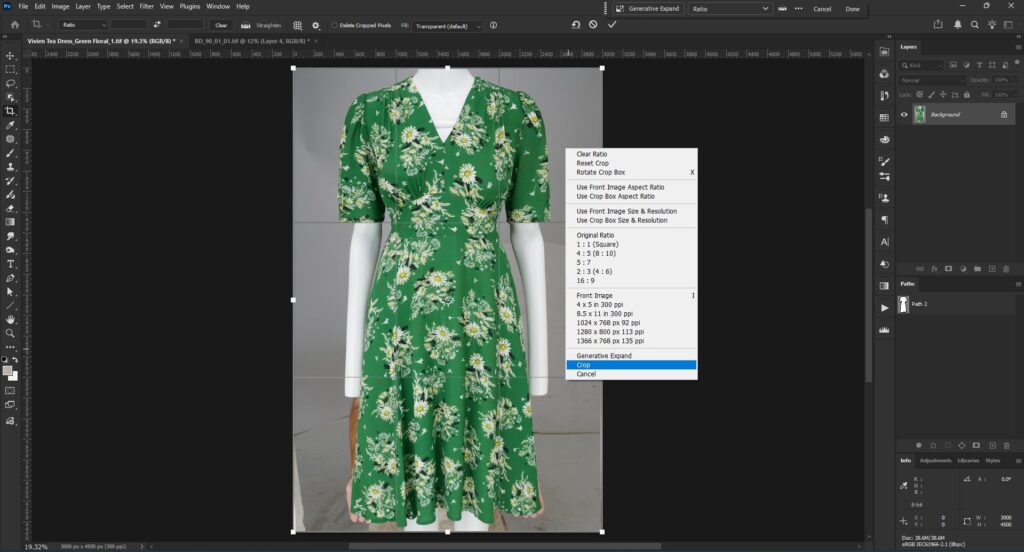
Now you should first try to auto-align your layer. Here, you have to select all your layers. Then go to Edit → Auto-Align Layers → Auto. Photoshop will try to match edges and angles automatically.
However, if the auto-align doesn’t give perfect results, you can fine-tune the layers manually. Here is what you need to do.
- Nudge layers into place with Move Tool (V)
- Resize or rotate slightly with the Free Transform tool.
- Now you should zoom in closely to check that the important points line up perfectly.
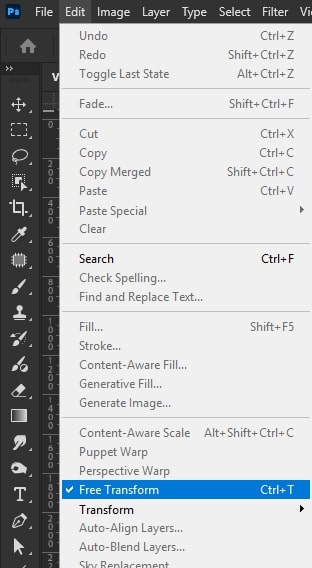
You are done here. Now, just save your project as a PSD file.
Step 3: Remove the Mannequin
We have come to our most important step. Now we have to remove the mannequin from the garment to create the floating effect. You have to be careful with the tools and approach to the professional results.
I) Choose the Right Selection Tool
Photoshop offers you different ways to select the area you want to keep. Here is a quick overview.
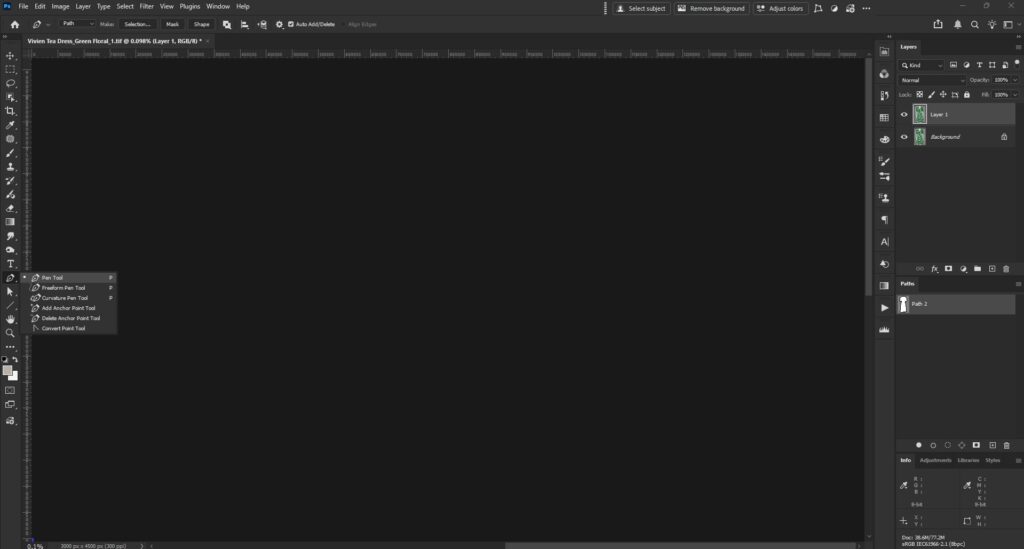
| Tool | Shortcut | Best Use | Notes |
| Pen Tool | P | Precise selection of complex edges | Best for fine detailsIt is slower but accurate |
| Quick Selection Tool | W | Large and contrasting areas | Faster for simple garmentsIt may need edge editing |
| Magic Wand Tool | W | Uniform color areas | It works for a plain background |
| Lasso Tool | L | Freehand rough selection | You should use it only for simple rough outlines |
II) Make a Clean Selection
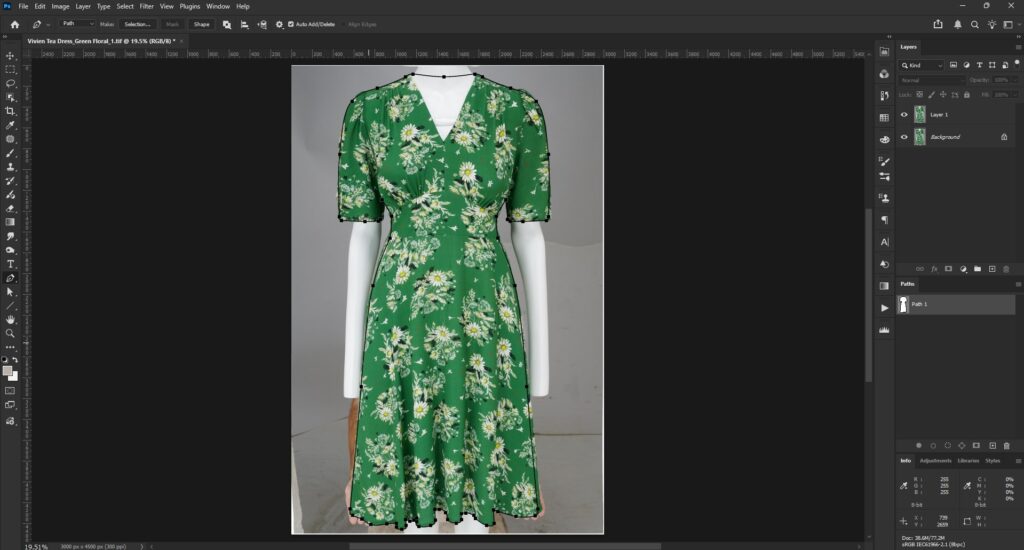
Now, you have to make a clean selection. You should zoom in closely to see the edges clearly. Next, you have to use your chosen tool and outline the garment carefully. If you are using the Pen tool-
- Click along the edges to create anchor points.
- Curve the line to follow fabric folds.
- Close the path and choose Make Selection.
Next, you have to feather the selection slightly. For instance, it can be 0.5–1 pixel for high-resolution images.
III) Use Layer Masks
Your selection is ready, right? Now, let’s move ahead to create a Layer Mask. It will hide the mannequin without deleting any pixels. Here is what you need to do.
- Click the mask icon at the bottom of the Layers panel.
- You will see that only your selected areas are visible. All other things will be hidden.
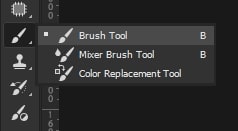
- Now, you have to use a soft brush (B) on the mask to refine edges. You can paint black to hide areas and paint white to reveal areas.
IV) Refine Edges with Select and Mask
If your edges need extra smoothing, you can use the Select and Mask tool in Photoshop. Here is a quick overview:
| Slider | Effect | Recommended Setting |
| Smooth | It reduces jagged edges | 1 to 3 px |
| Feather | It softens the transition | 0.5 to 1 px |
| Contrast | It sharpens selection | 10 to 20% |
| Shift Edge | Expands or contracts the selection | ±1 to 2 px |
V) Clean Small Areas
If your image has remaining spots even after masking, you should use
- Brush Tool on the Mask to paint carefully and hide or reveal areas.
- Clone Stamp Tool (S) to fix inconsistencies in small textures.
- Spot Healing Brush to remove dust or stray marks.
Step 4: Bring the Interior Layer into the Masked Gap
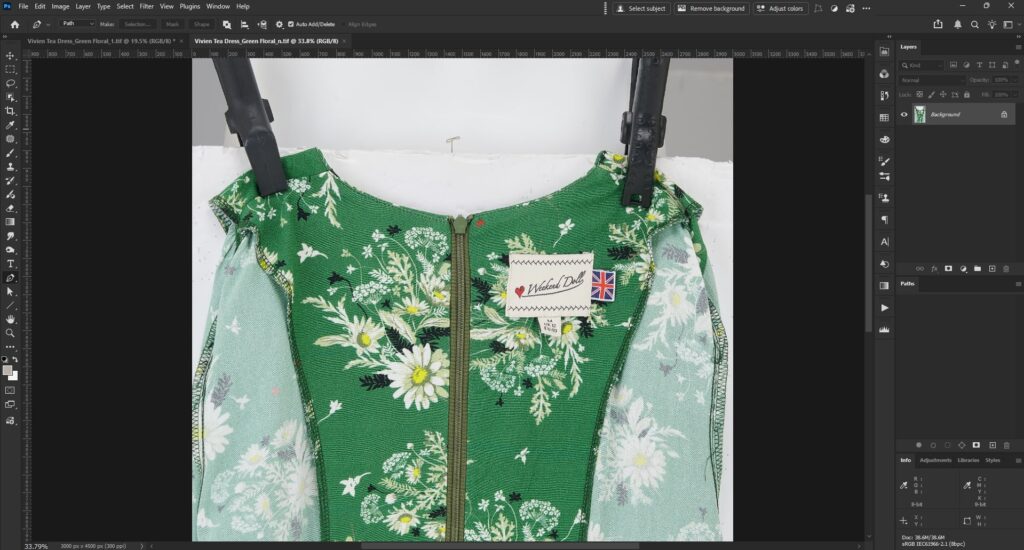
Well, we are done with the front of the garment. Now it is time for the collar or neckline. Let’s get started.
First, you have to place the interior image into your Photoshop project. You have to make sure that this layer is under the front garment layer.
Next, you have to resize and position the interior layer. You can use the Free Transform tool to adjust the size and rotate slightly. Ensure it aligns naturally with the neckline.
However, if the interior image doesn’t match the angle of the front layer perfectly, you should Warp or Puppet Warp tools. It will let you bend or adjust the interior layer with the natural curves of the garment. Here, you should take your time with small adjustments.
Coming for the next. You should blend the edges naturally by adding a soft layer mask and gently painting with a low-opacity brush. Feather the mask slightly to create a smooth transition.
Finally, you have to check the color and lighting. You can use Curves, Levels, or Saturation adjustment layers to match tones.
| Adjustment | Purpose | Tip |
| Curves | It adjusts brightness and contrast | It works on individual RGB channels for color matching |
| Levels | It corrects shadows and highlights | It focuses on midtones for realistic lighting |
| Saturation | It adjusts the color balance | It slightly reduces saturation if the interior layer looks too vivid |
At last, you should zoom out and inspect the garment as a whole.
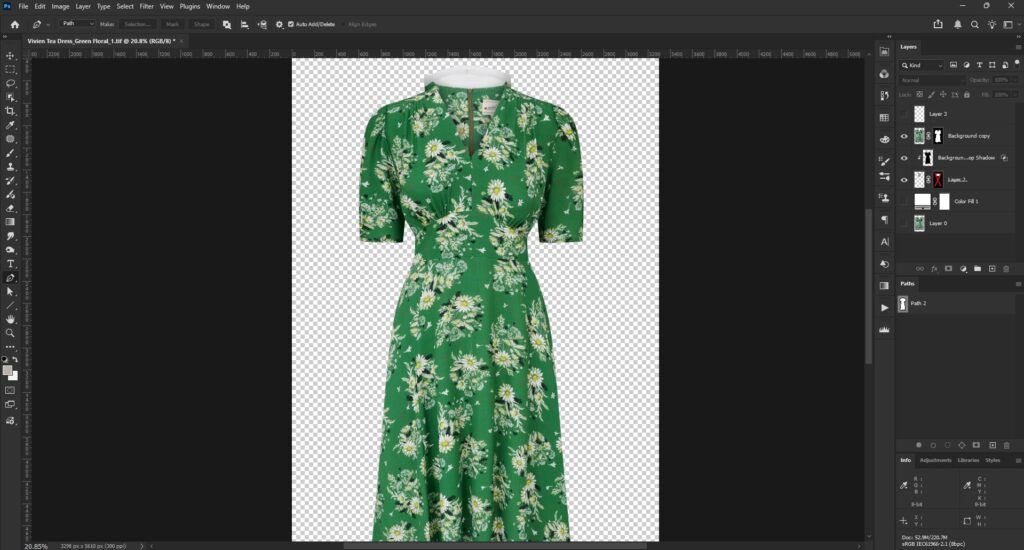
Step 5: Shadows and Depth
At this stage, your garment will already look like a ghost mannequin. However, you still have to take care of the shadows and depth. That is because the image can still look flat without this step.
I) Refine Edges for Smoothness
You have to zoom in closely on collars and sleeves. Next, use a soft brush on the layer mask to hide or reveal minor imperfections.
II) Add Shadows for Realism
You can add shadows in different ways in Photoshop.
| Method | How to Apply | Notes |
| Drop Shadow Layer Style | Go to Layer >> Layer Style >> Drop Shadow | Quick and adjustable. However, it may look artificial if you use it too much. |
| Brush Tool on New Layer | Create a new layer >> Soft black brush >> Paint shadow areas | It gives full control over shadow shape and opacity |
| Gradient Tool | New layer >> Gradient from black to transparent >> Position under folds | It is perfect for good shadow transitions |
III) Adjust Depth and Highlights
You have to create a new layer and set it to Soft Light or Overlay blending mode to adjust depth. You can use a soft white brush to lightly brighten areas and a soft black brush to deepen natural folds.
IV) Final Touches
We are all done with our ghost mannequin. Now we just need to have final checks before saving. Here is what we need to do.
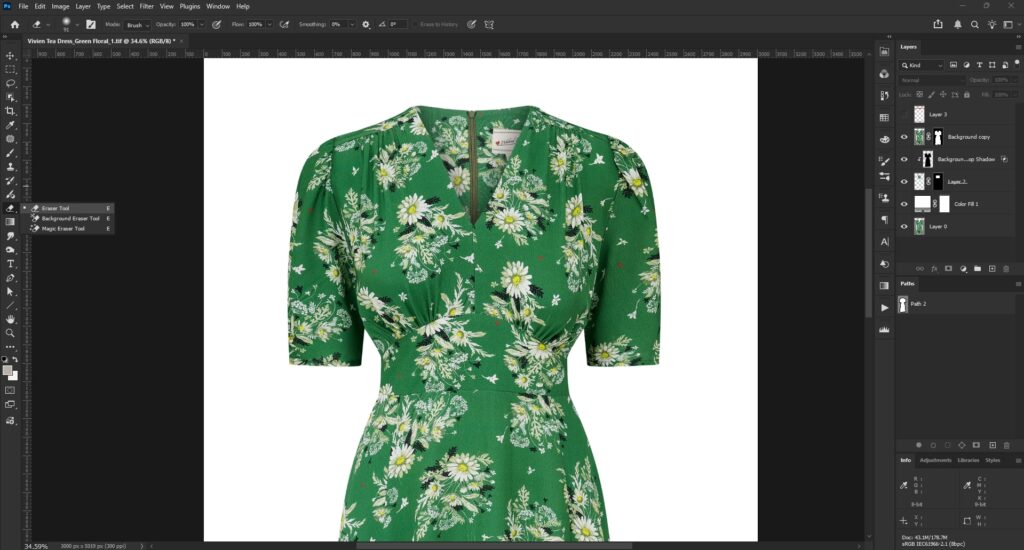
- Inspection for any visible mannequin remnants.
- Ensure all edges are smooth.
- Adjustment to shadows and highlights for a natural look.
- Zoomed out to see the garment as a whole.
Step 6: Export The Images
Let’s save our editing now.
I) Save Your Master File
First, you have to save a master PSD file with all layers intact. It will allow you to revisit and edit the image later if needed.
II) Choose the Right Export Format
You should choose the format according to your needs.
| Format | Best Use | Notes |
| PNG | Transparent backgrounds | It is perfect if the garment needs to overlay other backgrounds |
| JPG | Online stores with a white background | Smaller file size and widely supported |
| TIFF | High-resolution print | It maintains full detail and offers a larger file size |
Conclusion
As you see ghost mannequin is not an impossible task. You just need to follow professional steps carefully and practice them again and again. If you don’t want to take all this hassle, you can just outsource ghost mannequin editing for speed and precision. So, take your time and consider what will be best for your image editing needs for your ecommerce business.


